Reviews
TSX250 Build
Posted on December 9, 2015 • 9 min read • 1,859 words
Features
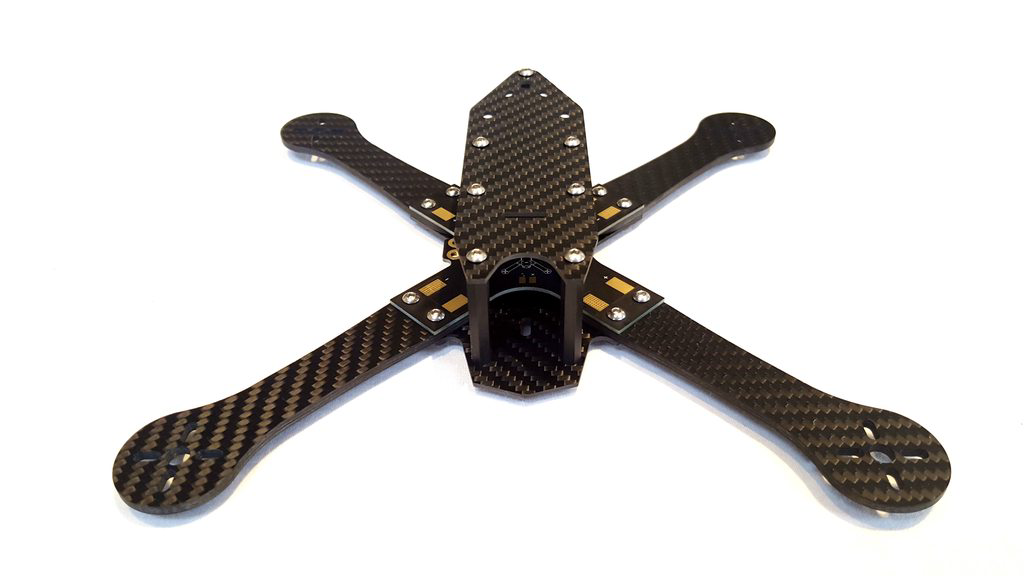
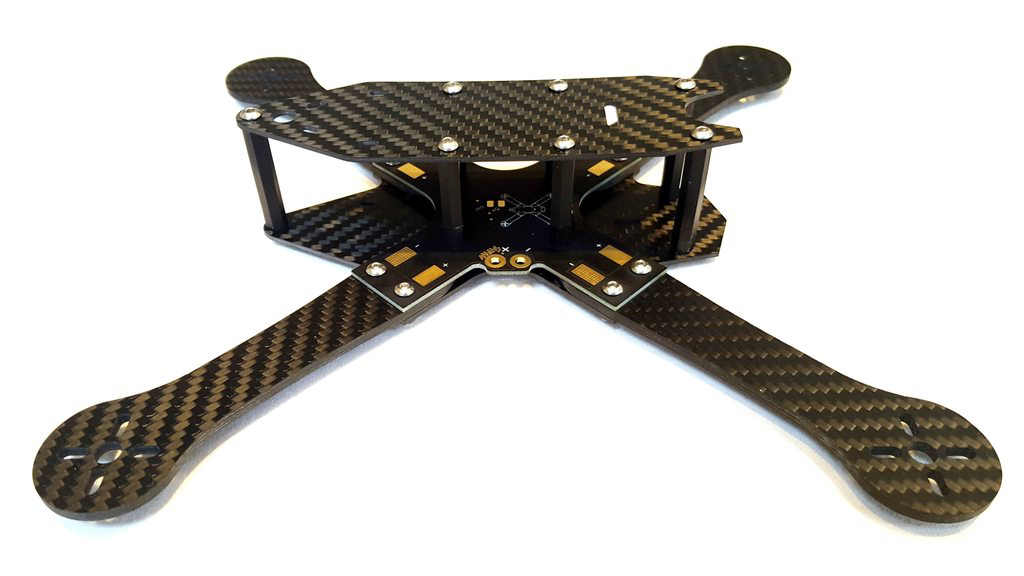
- X-Frame design - designed for simplicity, speed, and agility the TSX houses a 180mm quad size body with 220mm or 250mm arms, for 5" or 6" respectively.
- Integrated PDB with 5v regulator and all associated pads required for a tidy and hassle-free build.
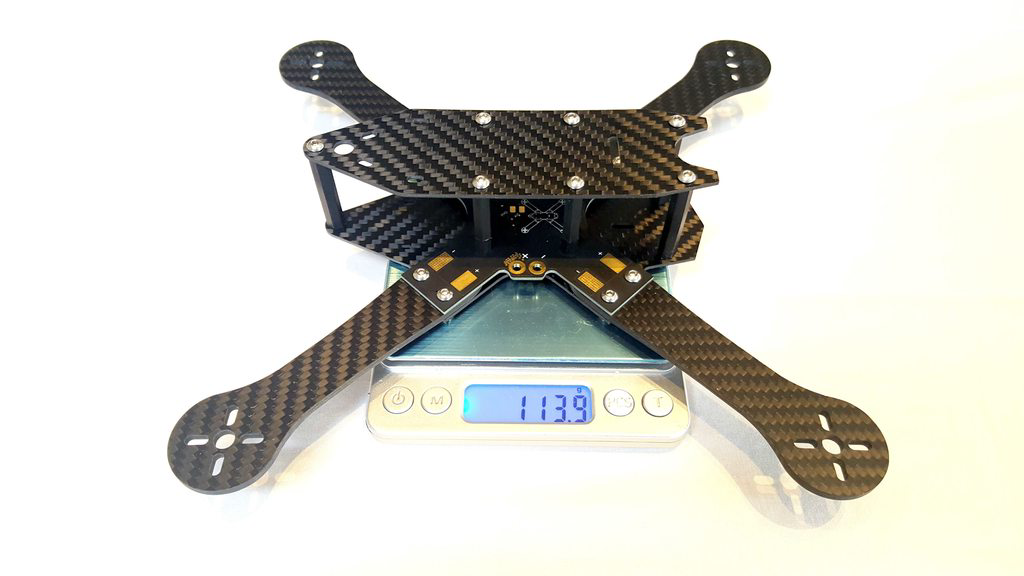
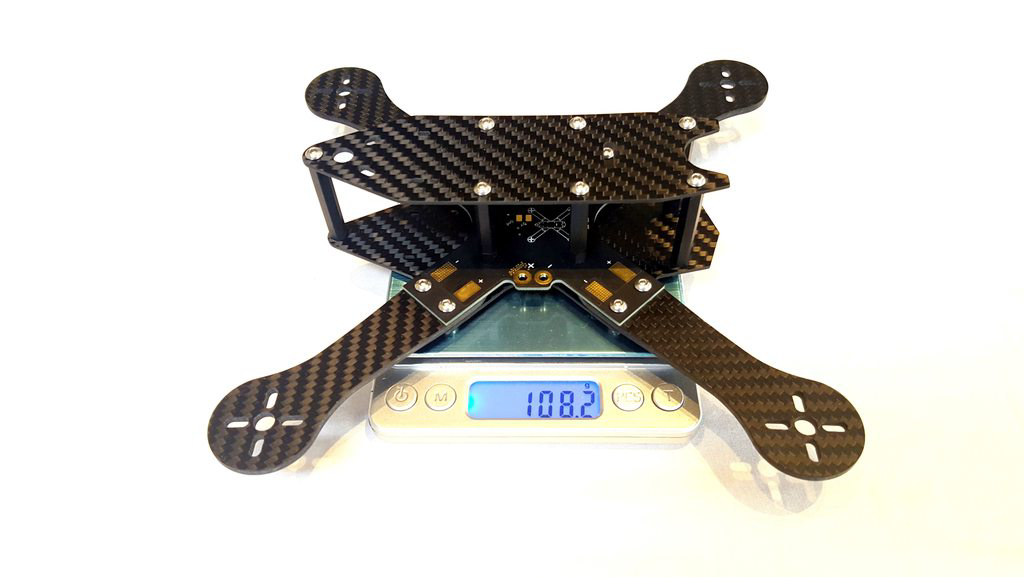
- 1.5mm matte twill carbon body with 3mm arms, meaning only 108g for the whole 220mm frame (with hardware), and 114g for the 250mm frame.
- Supports ZMR arms - a hugely common frame amongst all levels of pilots - why not use that redundant hardware instead of it gathering dust?
Prototype Phase
I was lucky enough to be one of the very few invited to build, fly and crash this frame, in order to make sure it was fully ready for the public. Sadly some motor issues (always the way…) meant I didn’t get to fly it as early as I had originally planned, but I like looking at things from a technical perspective so some improvements were suggested and implemented by myself and everyone else who was testing it, lo and behold we had the production-ready frame! :)
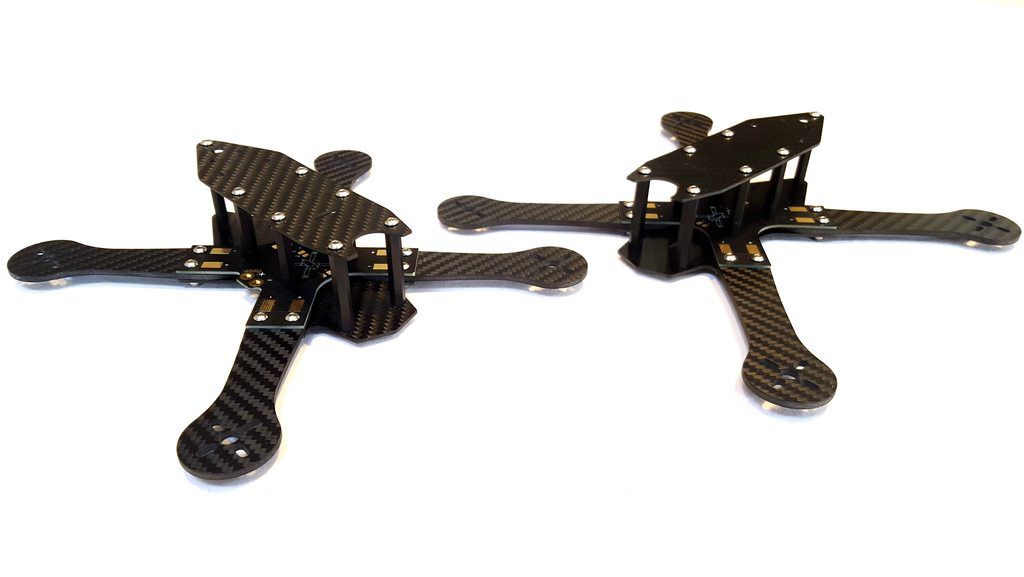
Production Ready!
So with all the suggestions and comments we had, Tom and Brett made the modifications, and it was time to move to the finished revision! And with that being said, I’m not sure anymore even needs to be said, I’ll let the pictures do the talking :)
The Build
It is worth noting on this post, the frame seen in my build is the prototype, with some subtle differences to the above production pictures, but you can get a feel for how awesome the frame is :). All of the actual construction of the frame does not differ, there are just some nice new features you can find out for yourself. :)
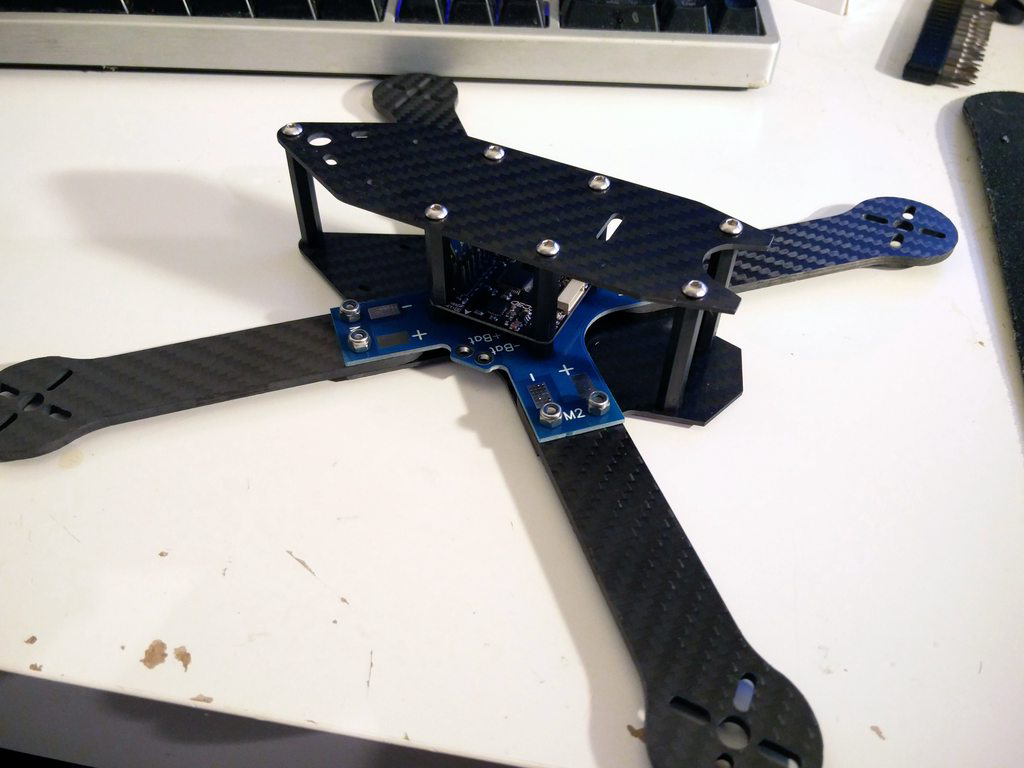
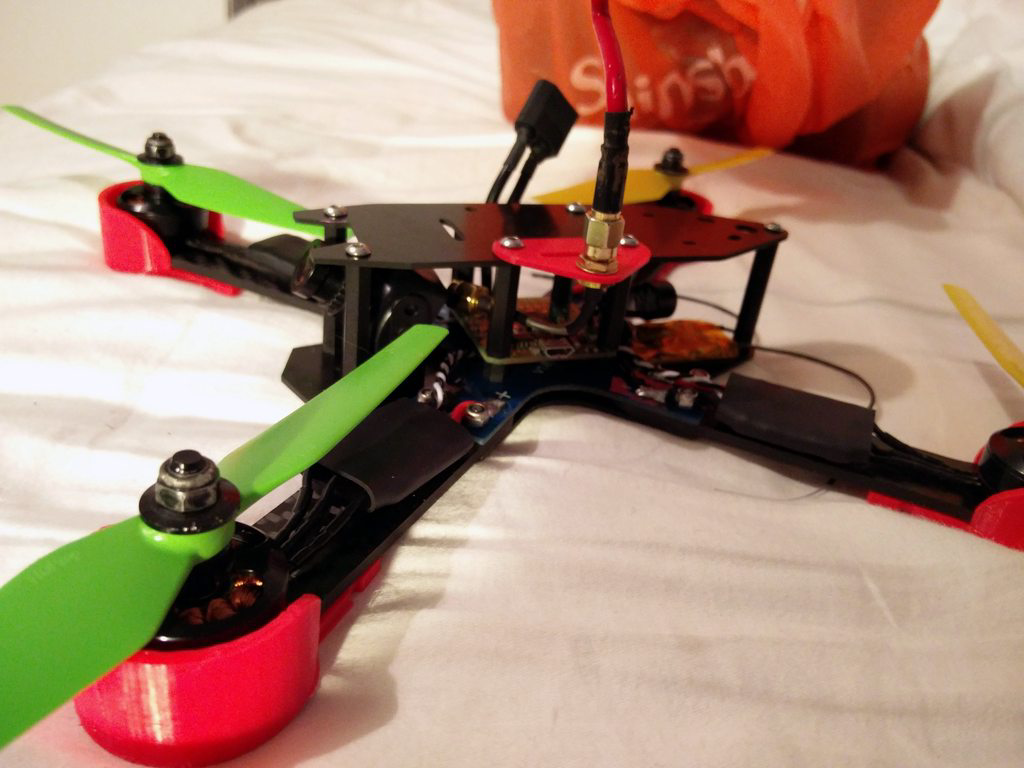
I set about putting the frame together with a spare CC3D I had lying around to see how it all fits together, checking out all the little details in the frame to see if anything is amiss or needing to be added etc - it all went together lovely with everything fitting perfectly. I particularly like the camera cut out here - the bottom plate provides adequate protection to the camera while the top plate has the cutout for the lens so you can obtain the maximum angle you need to fly - for most of us that is at least 35 degrees so it’s a good test to see if we can put the frame through its paces.
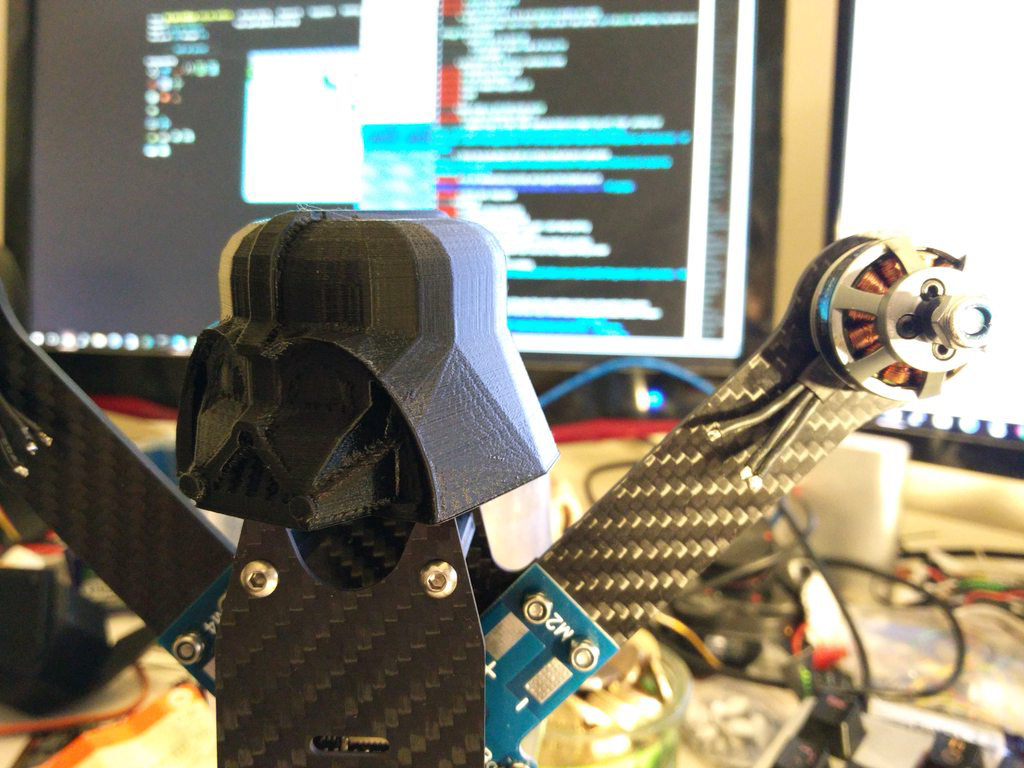
A bonus shot with a Darth Vader head. I have nothing to say other than this is badass. I was half tempted to not bother using the GoPro on it at some races, and just put the Darth Vader head on it instead - it would make for some interesting video watching it go around :)
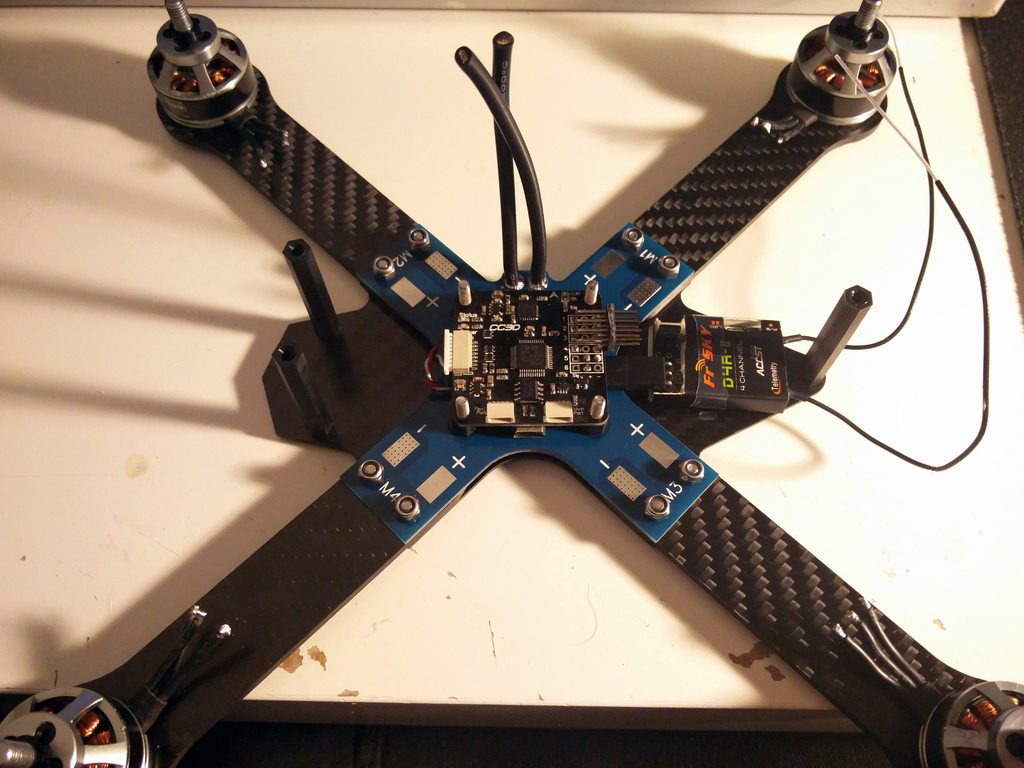
Here we can see some test-fitting of other components, and trying a rough layout of where the D4R-II could go. I do take pride in my builds despite them often being multi-coloured from the printed parts, for me the wiring is a big part in ensuring the quad is both functional and has the eye-candy to go with it.
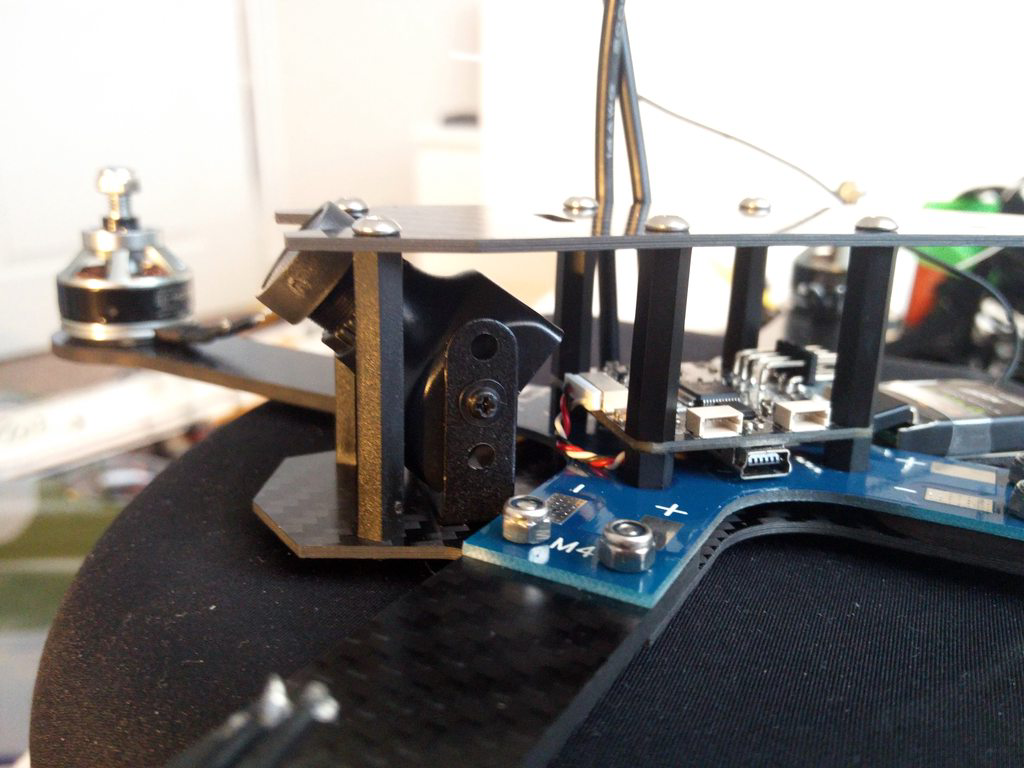
The next item was of course putting in the HS1177 - on the pre-production plates there are no screw holes for the camera so this was left very much down to us. Being new to the frame I wanted to have the best of both worlds - a good camera angle when I want it, but a protected camera when the angle is not so extreme (for tight courses).
The Change

At this point, I was in two minds as to whether or not to strip down my ZMR250 or to just build another quad. The easy choice was to build another as it’s great fun, and to try and re-use some old components I had (such as the T-Motors which are hilariously bent). I did end up getting a set of bearings, but sadly it did not cure their rough running so it was at this point I decided there was nothing else to do but tear down the ZMR250 and re-house it - something which I would be doing at some point down the line anyway as this would be my new “go-to” quad.
This meant a few spec changes - I’d now be running:
- Cobra 2204 2300kv
- Rotorgeeks RG20’s
- RMRC Dodo flight controller
- X4R-SB receiver
- HS1177 CCD FPV camera
- Aomway 200mW Video transmitter
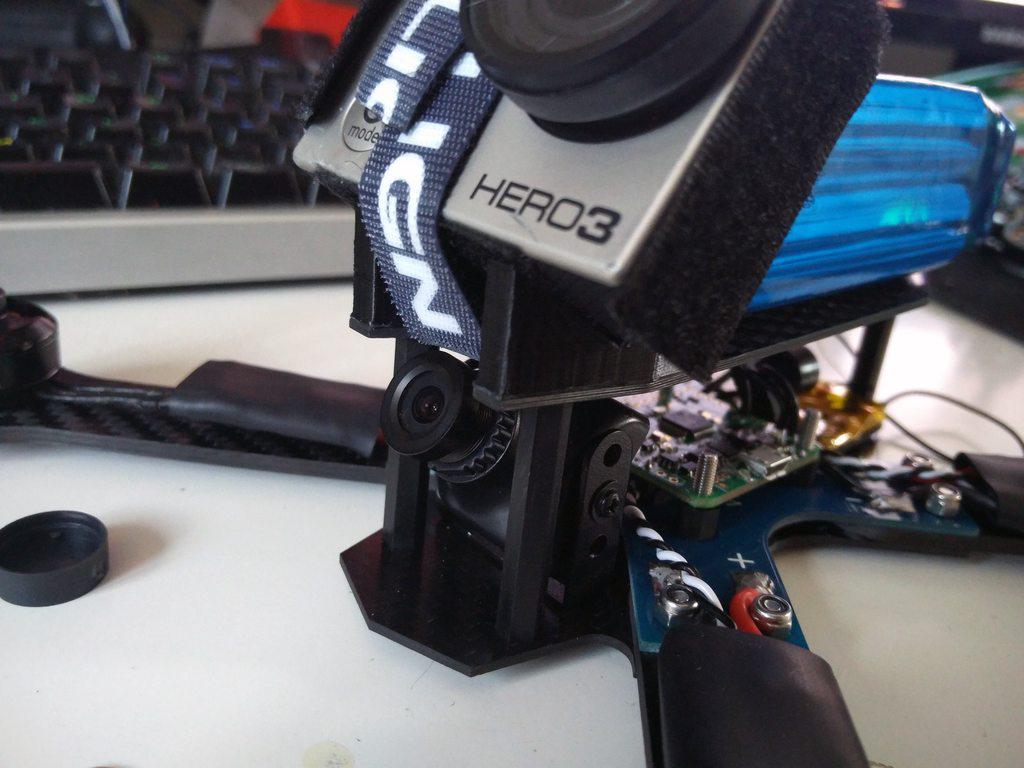
The next part of the testing was actually see how well the GoPro mount would work, particularly as I am one of the only people running 1800mAh 4s, so it was interesting to see how well stuff fits still - as you know it’s running a 180mm size body so space is actually quite limited. I’m pleased to say it actually fits very well - I do plan to downsize Lipos in future so that I can get that level playing field when racing (to reduce some more weight and give me some better agility), but the option is there if I want it for longer courses or just fun flying :).
At this point I suggested having motor-protectors - having flown in car parks many many times, I know all to well how brutal crashes can really be quite painful, and the repair bills do take their toll when you are killing motors and lots of props each session. It starts adding up, especially with Cobras. Warren kindly developed this motor protector, and I can say having used them in the UK Drone Show on the weekend just gone, they 100% helped. There were a few crashes where I had unfortunately smashed into the ground (who put that gravity there?) - however the motors were not even scratched, and the PLA motor protectors had cracks in them as I had planned - strong enough to take the impact but not strong enough that they damage other parts of the frame. They are very very cheap for me to print so it seems ideal. I would print these in ABS but I don’t really like printing ABS as it’s a pain to do so.
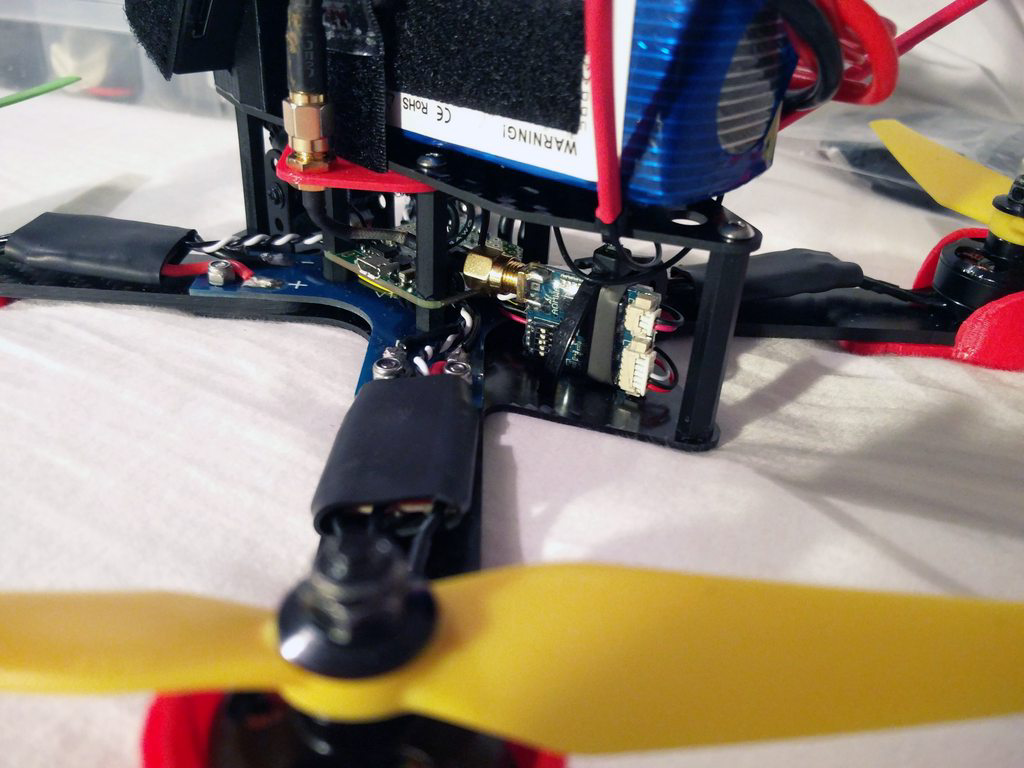
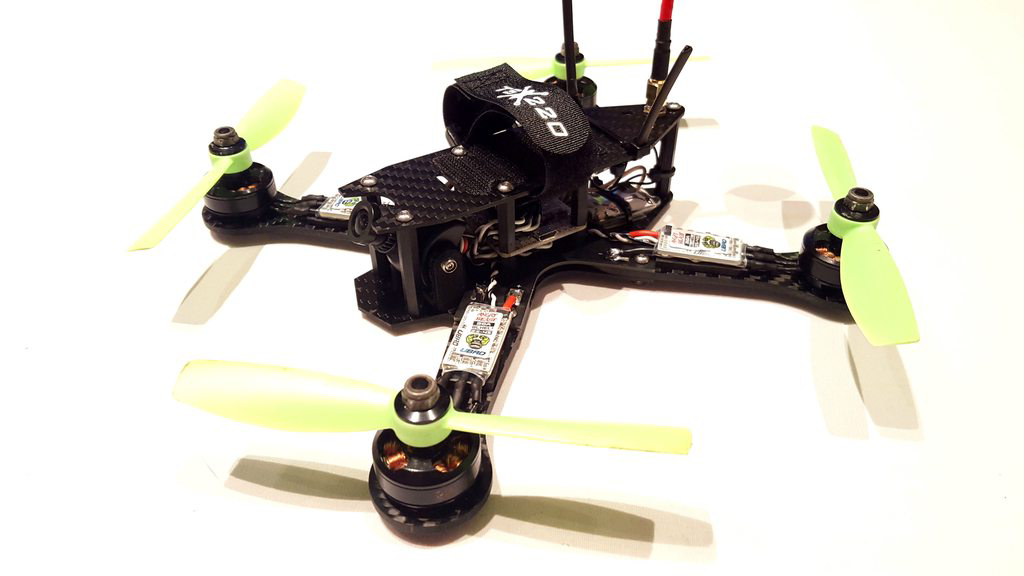
You’ll also notice in the previous picture and in this one that I was testing as a prototype for Tom - a side-mounted antenna mount - for those like me who were running 1800mAh 4s but still wanted to film their flights as well. I have to say this worked very well, you can see there’s a slot in-between the frame and the antenna - that’s for the battery strap. I believe this will be available as an extra, and as you can see on the latest picture I’ve used shorter standoffs to make it sit below the top plate, meaning the battery placement or height is not affected.
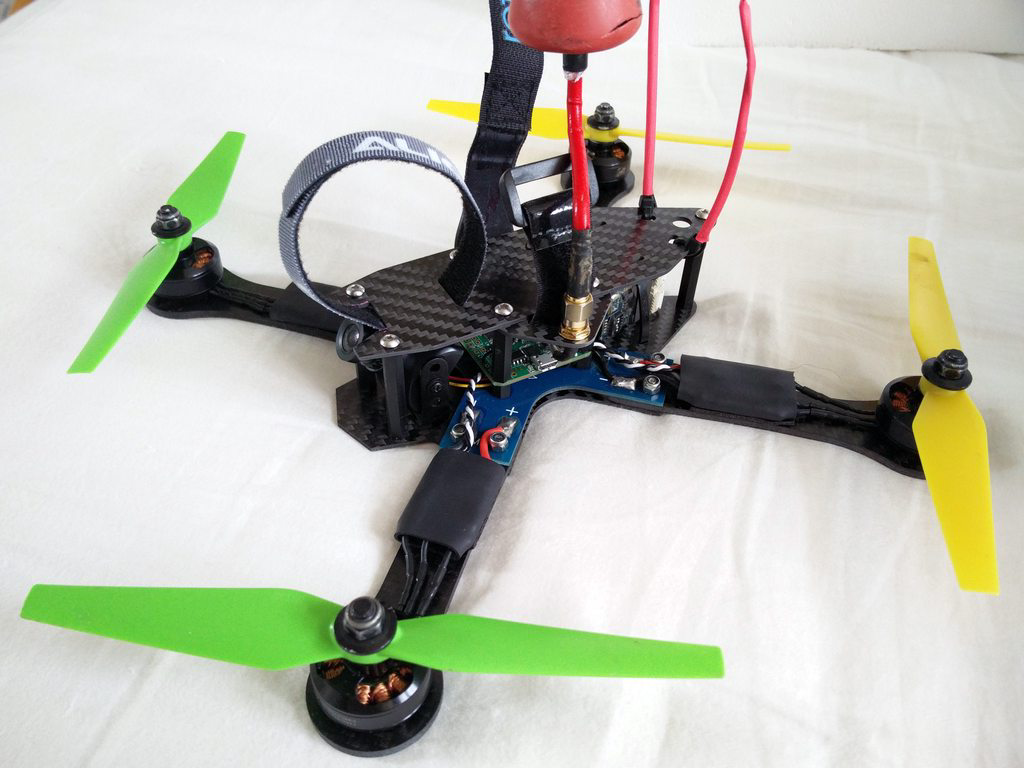
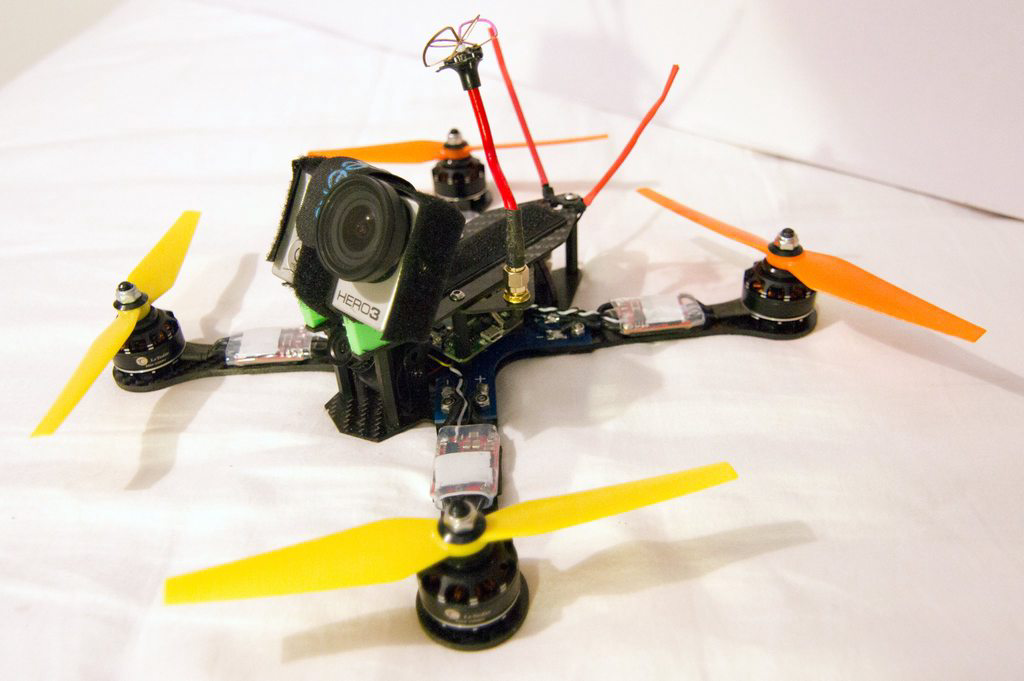
Here’s the quad fully built, with said carbon plate in, the only thing missing is my GoPro - but that was for a specific reason. If you remember from the pictures above, the hole for the camera in the top plate is actually round - not ideal if you plan to use the slot for a strap - so I have sanded it back, and into a flat piece so that I can perfectly fit one of my Align straps. The GoPro mount has actually changed since then, and we are not using the top plate for the strap at all - so that is very much a problem solved :)
I made sure to take this picture before the tear-down as that was my main focus on the TSX - the ZMR actually did everything I needed, except it was a little on the heavy side, but I knew already from the get go that the TSX would be a huge improvement on weight, which in turn means better flying characteristics and more agility.
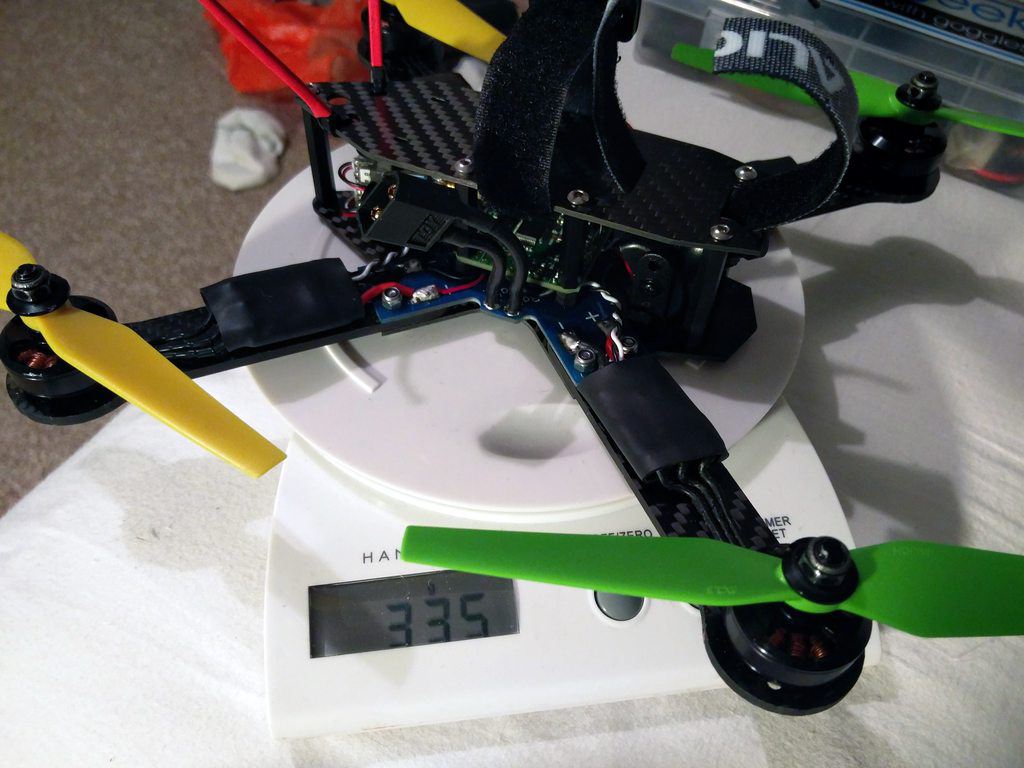
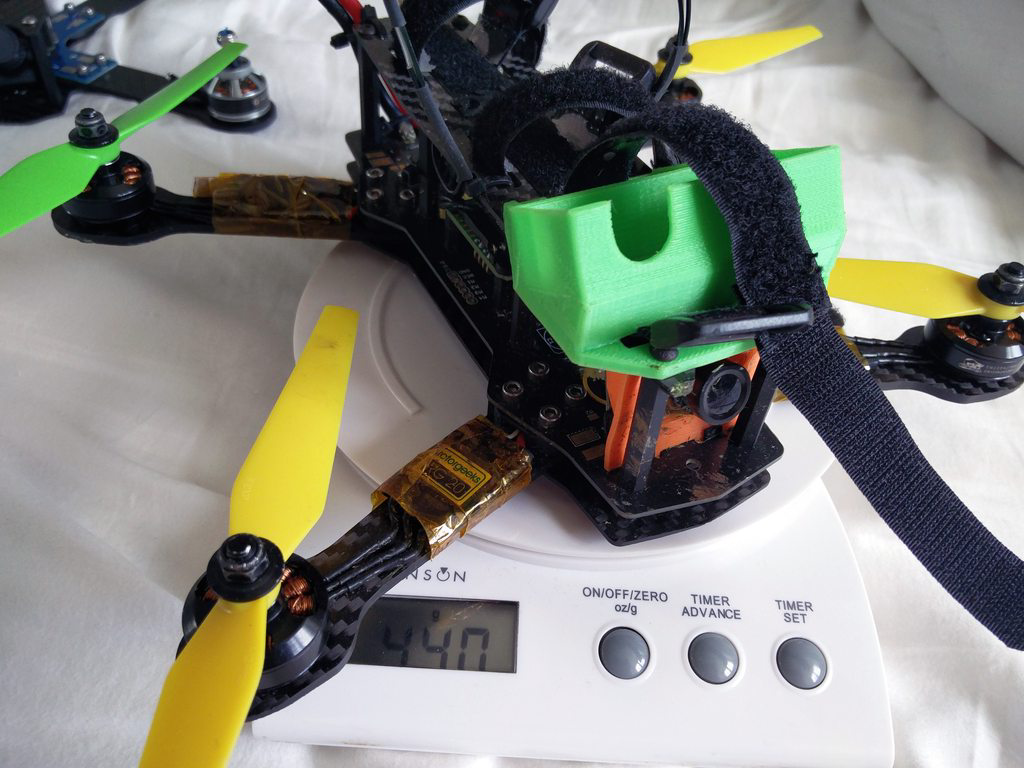
So the all important weight - and what’s that? Over 100 grams lighter! Now, I don’t know about you, but I think that is an amazing saving considering both quads run PDBs, and in fact run roughly the same arm lengths. I am over the moon about that, that is such a saving it’s unreal. Saving weight on quads is not easy when they already have a PDB - most of the wiring you would usually shorten is not there to cut, so the only way you can normally save weight is by cutting corners - not something I’d want to do - so this is amazing.
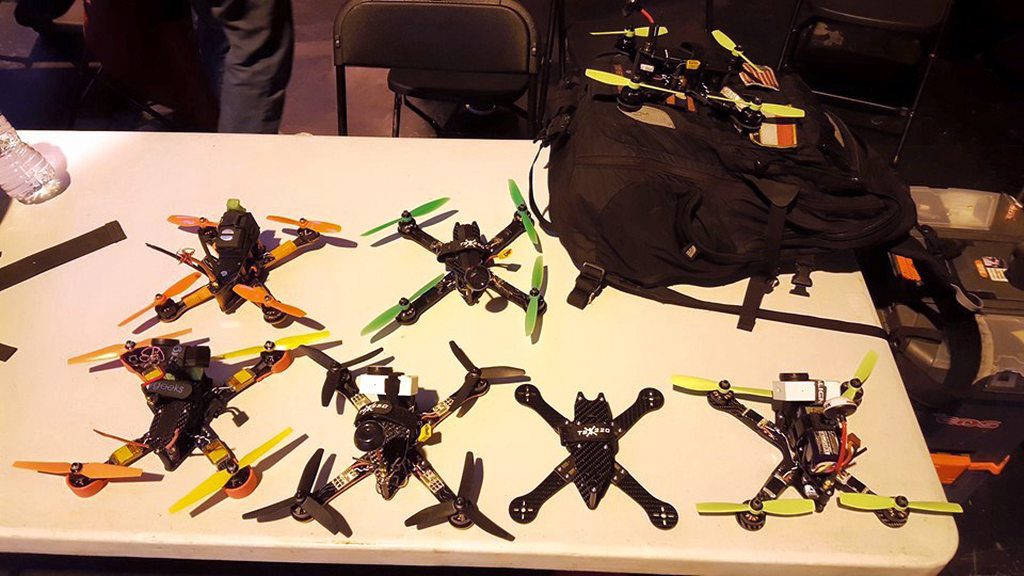
In Action & Launch Day - UK Drone Show 2015
And here it is in all it’s glory - ready for the UK Drone Show. I can tell you it performed superbly. On the Sundays’ racing, the top 3 finalists were all running TSX250’s, including BanniUK. The public absolutely loved in, and more importantly - so did all of us flying it. Considering I had literally 5 minutes of tuning done on the Friday before the rain kicked in and during high winds, it flew absolutely flawlessly.
I admittedly did have an arm broken (actually the first race of the first day), but that was down to Luke (BanniUK) flying into me that fast, the impact was really quite something. I can safely say there were no other injuries over the course of the weekend, and when you consider we were flying in concrete and the stakes were high, so many mistakes were made and in turn we all had a few crashes (well, most of us) - the frame has more than lived up to expectations.
Here’s BanniUK’s Final run - such insane speed.
My ZMR felt “comfortable”, and I liked that - but at the end of the day I go to all these events to race, and it is not a place you should feel comfortable, not even for a second. So I made the decision to move my ZMR250 components (remember this is a fully working, fully tuned, awesome flying quad) into a brand new frame without any knowledge prior, and I can say 100% that I made the right decision. I know I keep banging on, but the frame is really that good, and that really does conclude my thoughts on the frame.
The frame is available at: Stanton Frames and I-Drone.
There’s also a Facebook group full of tips, tricks and builds here.