Reviews
thinkTANK - The Backpack shootout!
Posted on March 24, 2017 • 20 min read • 4,229 words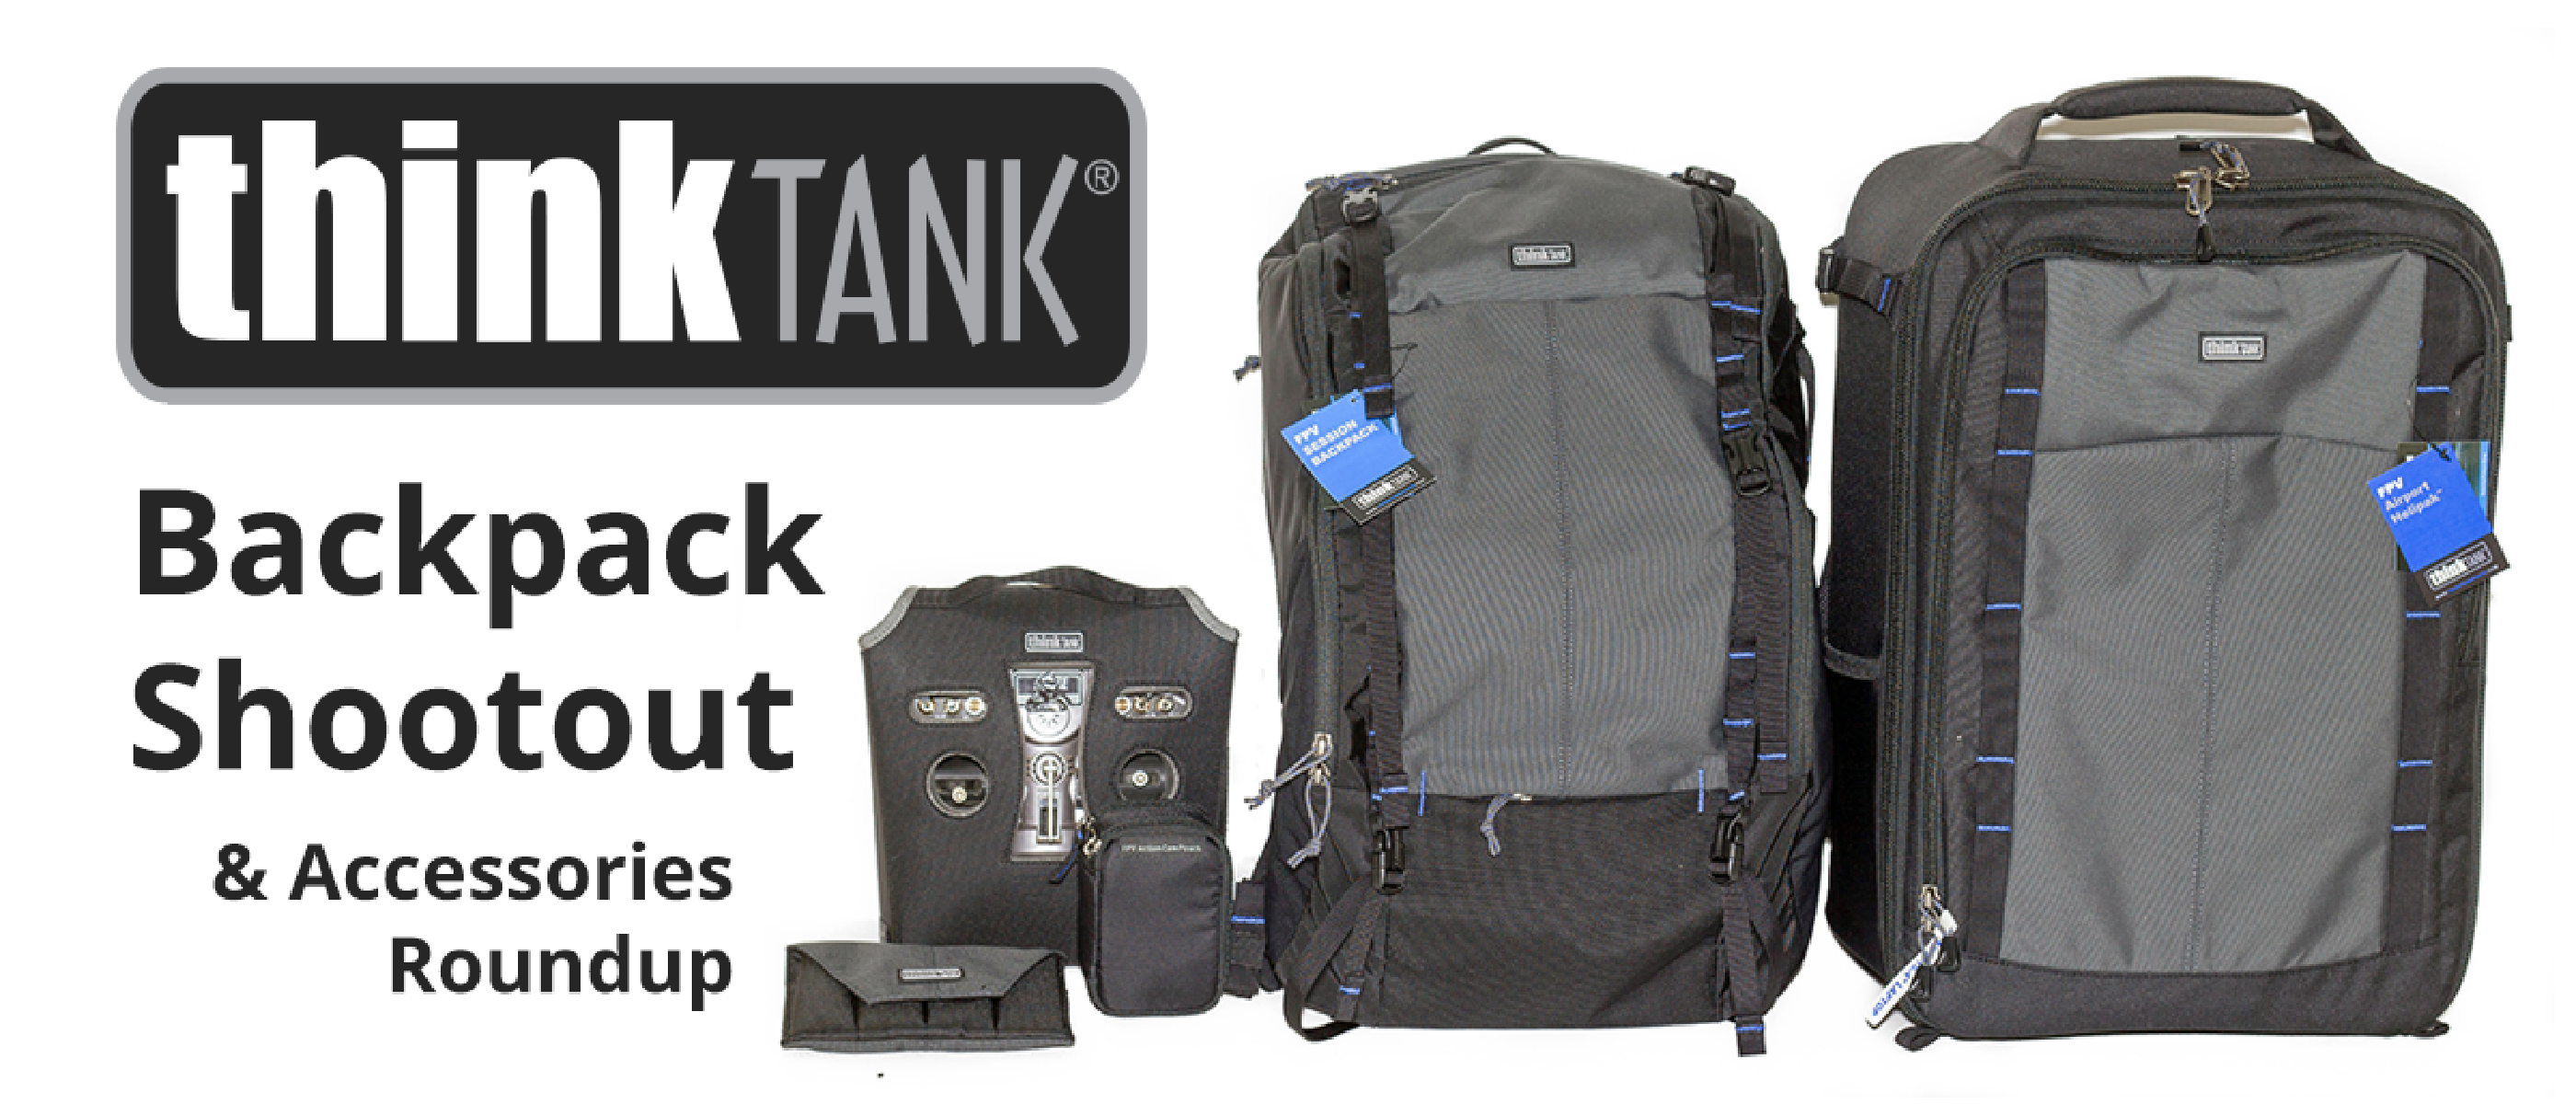
First off before we even begin I’d like to thank ThinkTank for kindly allowing me to do this review. The opportunity came up and it was an obvious choice to accept - I have already reviewed the Lowepro BP X2 - so my main focus was really how do other backpacks designed for FPV compare? As you’ve probably seen, the FPV Session is a hugely popular backpack used by most of the big named pilots. The FPV Airport Helipak is a newer model and is kind of as you’d expect - designed for those looking to fit a bit more gear and have some padding for travelling.
Because there’s so many products in this review, and I wanted to do them together, I’ll first go over some of the key features of all of the products. After that I’ll move into my real-world usage and testing, and let you know how I’ve got on with them, what I think of them after having used them for a couple of months now, and how they stack up compared to the competition!
Product Links
FPV Airport Helipak Backpack - Amazon US / Direct / Clifton Cameras - UK FPV Session Backpack - Direct / Clifton Cameras - UK FPV Radio Transmitter Cover - Amazon US / Direct / Clifton Cameras - UK FPV Action Cam Pouch - Amazon US / Direct / Clifton Cameras - UK FPV 4 Battery Holder - Amazon US / Direct / Clifton Cameras - UK
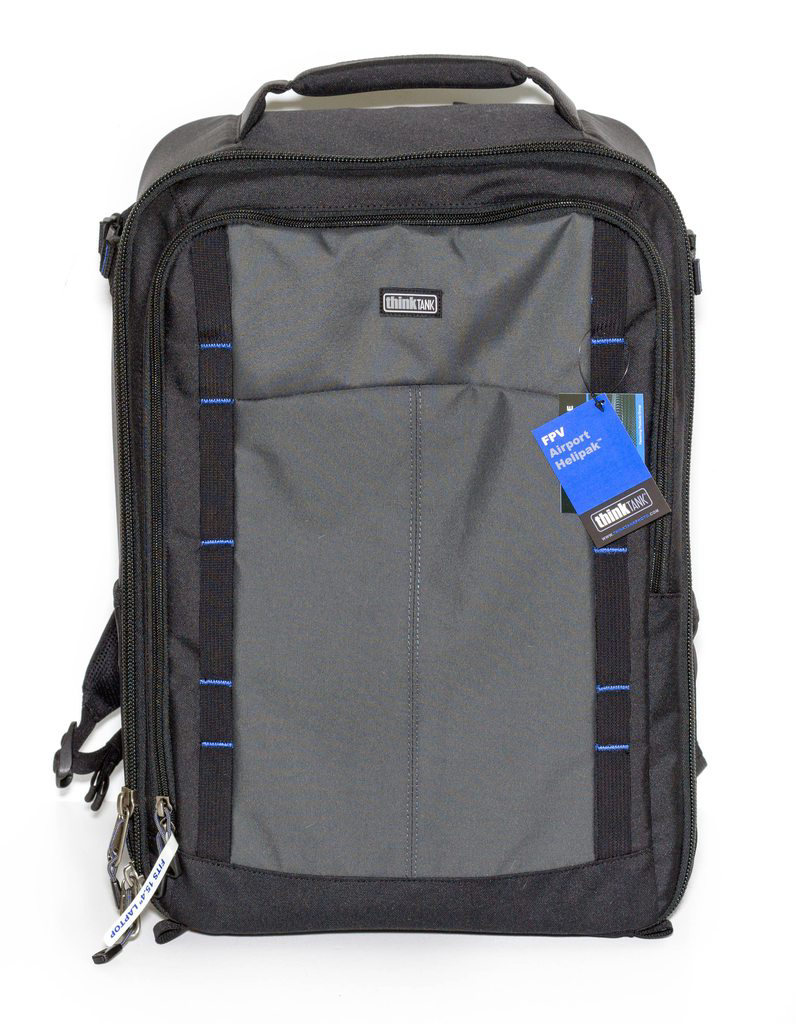
Airport Helipak
First off we have the FPV Airport Helipak - not to be confused with just the Airport Helipak (which is designed for a DJI Phantom). The Airport Helipak Backpack is designed to transport all of the racing gear you’d need for a flight session, freestyle chilling or of course a race event. It’s a larger design than the FPV Session containing custom dividers that allow you to also move them around to suit your exact needs.
Set at $200 it’s a big investment for your average joe, but if you are planning to go to lots of events, or take your quads with you on your journeys then getting some decent quality storage for transport is key.
Here’s the blurb from the product’s official description:
Key Features
- Custom divider set specifically designed for the FPV pilot allows you to reconfigure your * bag depending on what gear you are carrying
- U.S. domestic and international carry-on size compatible *
- Dedicated 15” laptop pocket †
- Check with your airline for current carry-on requirements
- Multiple lash points to attach drones or a portable chair to the outside of the pack
- Pockets for tripod attachment or water bottle on both sides
- Elastic daisy chains in main compartment hold essential tools, props or antennas
- Easily configures to hold complete parallel charging systems
- Extra large internal pocket for props
- YKK RC Fuse zippers, 1680D Ballistic nylon bottom panel, metal hardware, and nylon webbing are the most durable, long lasting materials on the market
- Internal see-through mesh pockets for small tools and accessories: rotor blades, screwdriver, cables, etc.
- Contoured adjustable harness with lumbar support, articulated air-channel and removable padded waistbelt enables travel into remote areas
- Height adjustable sternum strap
- Robust handles ensure rapid and easy retrieval from overhead bins, car trunks, etc.
- Seam-sealed rain cover helps to protect your gear
So as we can see this backpack is no slouch, it has a ton of features and great quality materials used which make it perfect for one of those ‘buy one - use forever’ backpacks - many go through cheap $15 ones from eBay, but they tend to break after a few months. I did exactly that in Ibiza for the ERSA Euro Cup, but only as I ran out of storage to take anything else! I brought it back with me, but it didn’t last much longer than the trip.
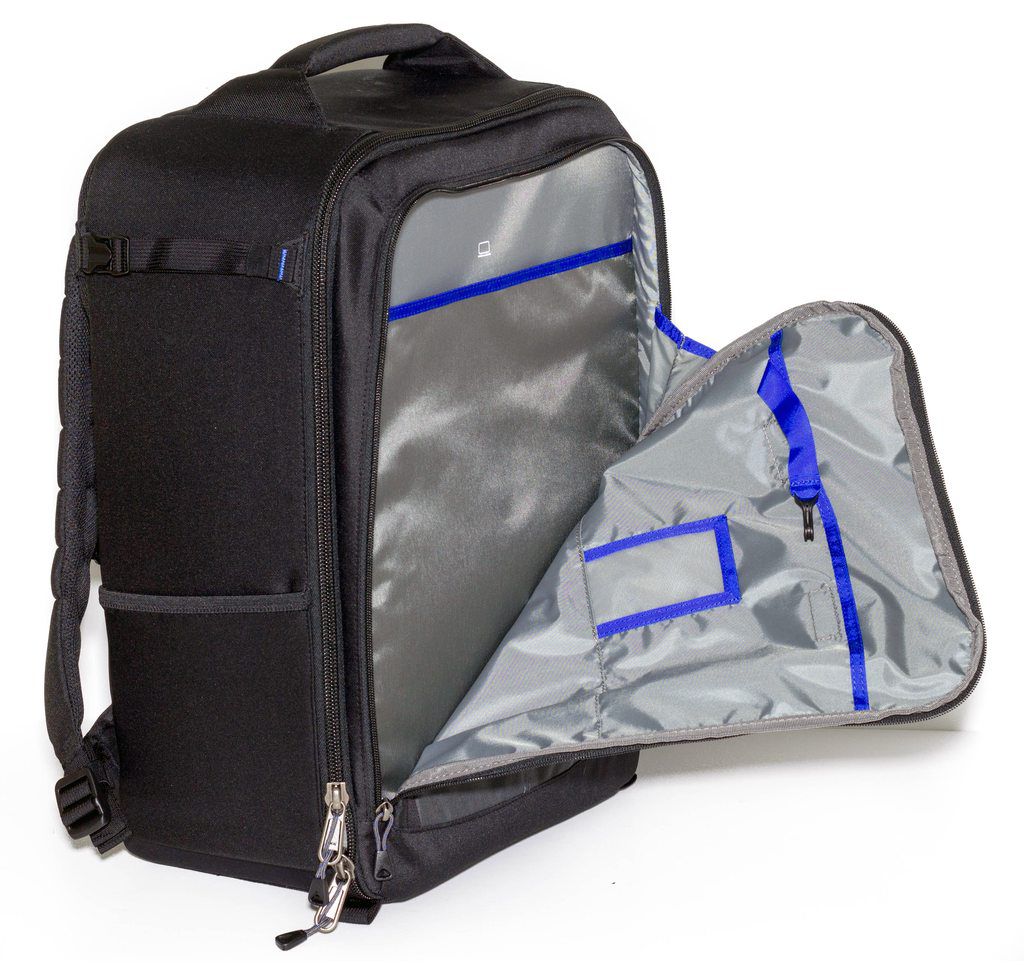
From the inside compartments we can see there’s ample storage on the outside for a laptop. While it’s not protected from the outer elements it makes perfect sense for a carry-on bag (aka what it was designed for), as long as you are not throwing it around.

We can see here we’ve got some awesome features for the straps - they have material going all the way down sewn in which allows things to be attached, as well as a movable chest strap if you plan to carry heavy stuff and want some shoulder support. There’s also a waist strap to keep that lower area of the backpack in check and reduce any back strain.
Inside flat against the laptop storage area we’ve got a couple of simple zipper storage areas.
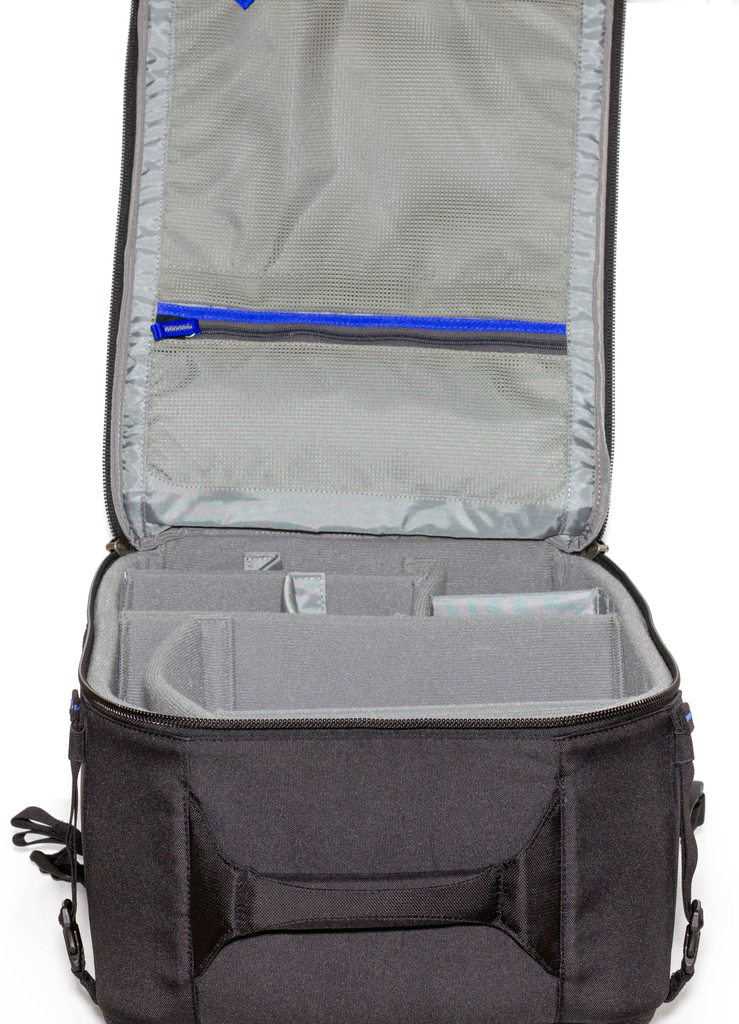
And here’s the guts of it! Inside we can see we’ve got some silica bags to stop any moisture during transport/storage, and a ton of space! The dividers are setup in this layout by default but of course being Velcro you can position them any way you wish to. You can also see all of the big dividers and the main area of the backpack has more material sewn in to attach straps to - useful for securing any larger items such as your drones. Just to the side we can also see the waterproof cover that also comes with it, a nice touch that would definitely have been useful in Hawaii back at Drone Worlds, that place had some pretty severe and constant showers!

The sides of the backpack are kind of what you’d expect from a big like this - there’s lower elastic-based storage that expands depending on what you put in it, with a strap higher up. A useful area to put a tripod etc, or another large object that may not fit inside but is easily secured to the bag.
FPV Session
Much like the Airport Helipak, the FPV Session is designed FOR mini quads and drone racing or freestyle in general. Priced at around $150, the bags appeals to a slightly different market, focusing on the smaller and lighter backpack for all your general sessions, or for those who prefer to attach their quads to the outside of the backpack. They have meticulously thought out their design to optimise space and storage for the kinds of stuff we need to bring with us, whether its a full day session or just a few quick packs.
Here’s the blurb with the key features:
- Fits 2-3 quads on the front of the backpack or with props removed, 2-3 on the inside of the backpack
- Interior fits a radio transmitter, FPV goggles, 8-15 batteries, antenna, props, spare parts, a small to medium tripod, folding chair, water bottle, etc.
- Unique layout keeps all your components contained and accessible while you fly, and be ready to pack-up quickly
- Adjustable interior “shelves” allow a custom fit for your specific configuration
- Interior compartments organize all your gear needed for a session
- International and domestic carry-on size compatible*
- Dedicated top compartment keep your radio transmitter and FPV goggles at the ready
- Elastic pockets for multiple batteries
- Elastic straps are perfectly sized for an antenna, tools, or small items needed quickly
- YKK RC Fuse zippers, 420D high-density and velocity nylon fabric and nylon webbing for long-lasting durability in rough conditions
- Large interior pocket fits a Li-Po Safe bag (sold separately) full of batteries when traveling
- External webbing daisy chains and buckles for easily attaching drones or even a small folding chair to the front of the bag
- Seam-sealed rain cover included
- Internal mesh pockets for tools and small accessories: rotor blades, screwdriver, cables, etc.
- Side pockets fit a small tripod or water bottles
- Adjustable harness with air-channel, height adjustable sternum strap and a removable webbing waistbelt allowing travel into remote areas
- Rain cover included to protect your gear in inclement weather. Stows away inside bottom front pocket when not in use.
So like the Helipak it has a feature list as long as your arm, with the same high quality materials used in it to make sure that you get your moneys worth. Let’s face it, a bag like either of these is an investment in your gear and ensuring it all gets to where you need to go in one piece.
So with that all in mind let’s go for a quick photo overview like we did with the HeliPak.
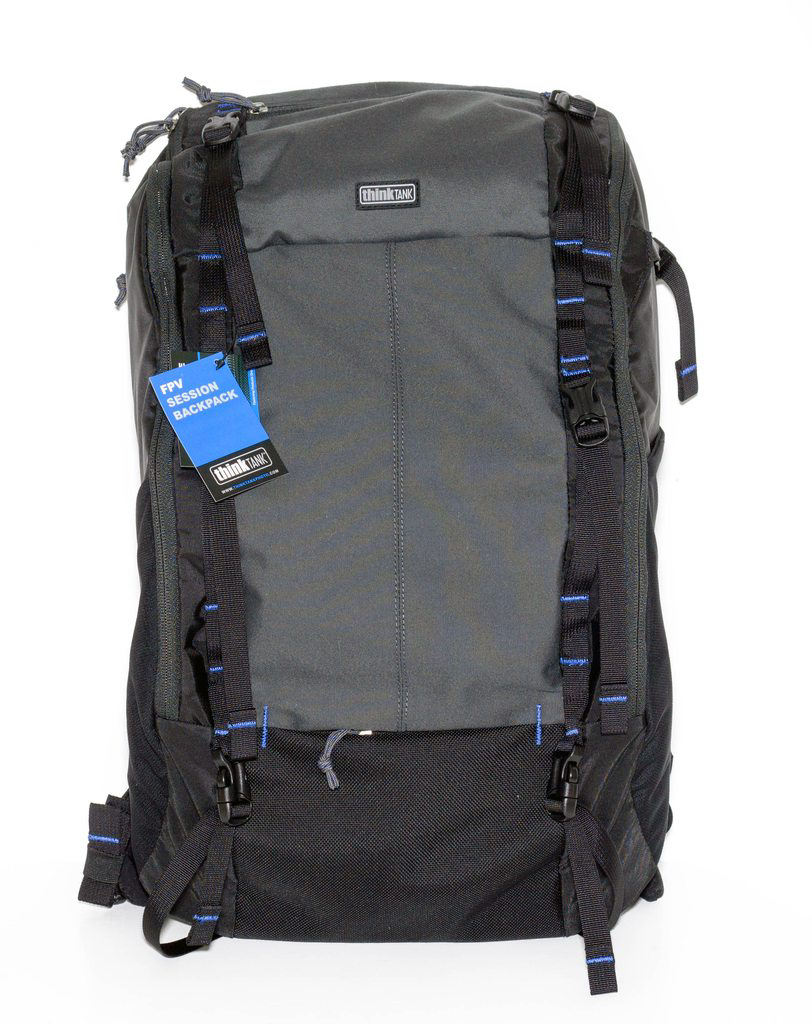
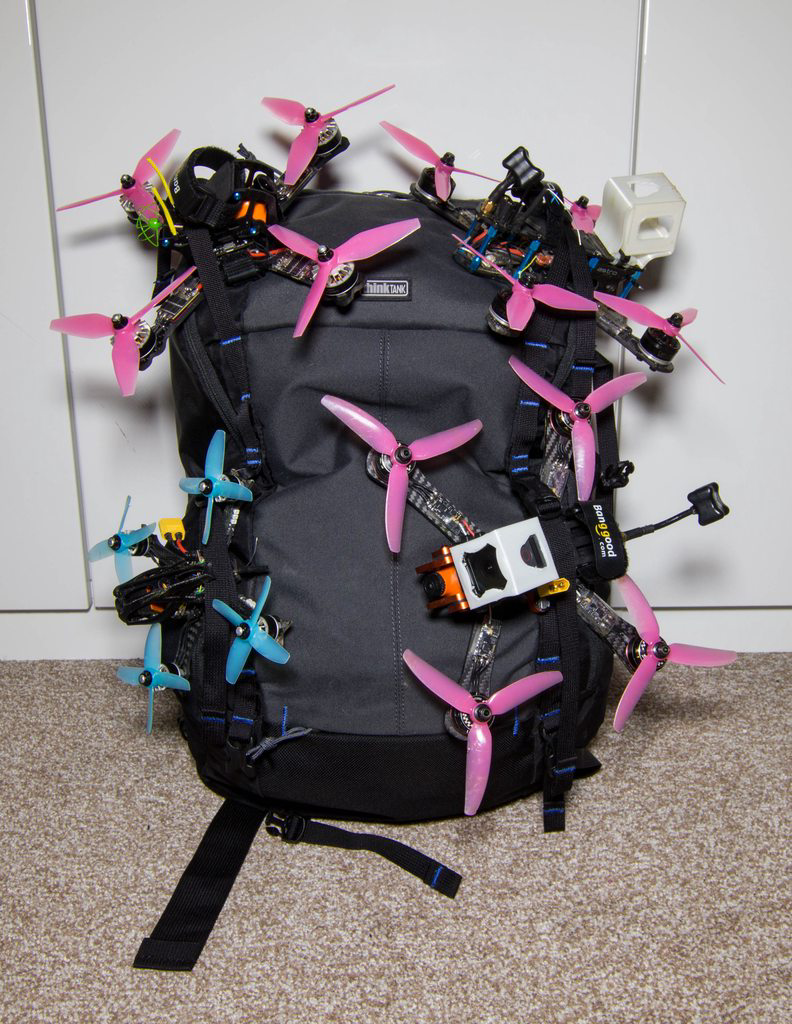
The front will be the key shot that most are interested in, particularly those who want to store a lot of quads on it. Coming in as standard are 3 adjustable straps located on each side, with extra stitched areas to attach other harnesses and such to. If you were trying you could fit at least 6 quads on here without any issues!
Hidden just over halfway down is a zip holding another storage area, currently housing the waterproof cover that it comes with.
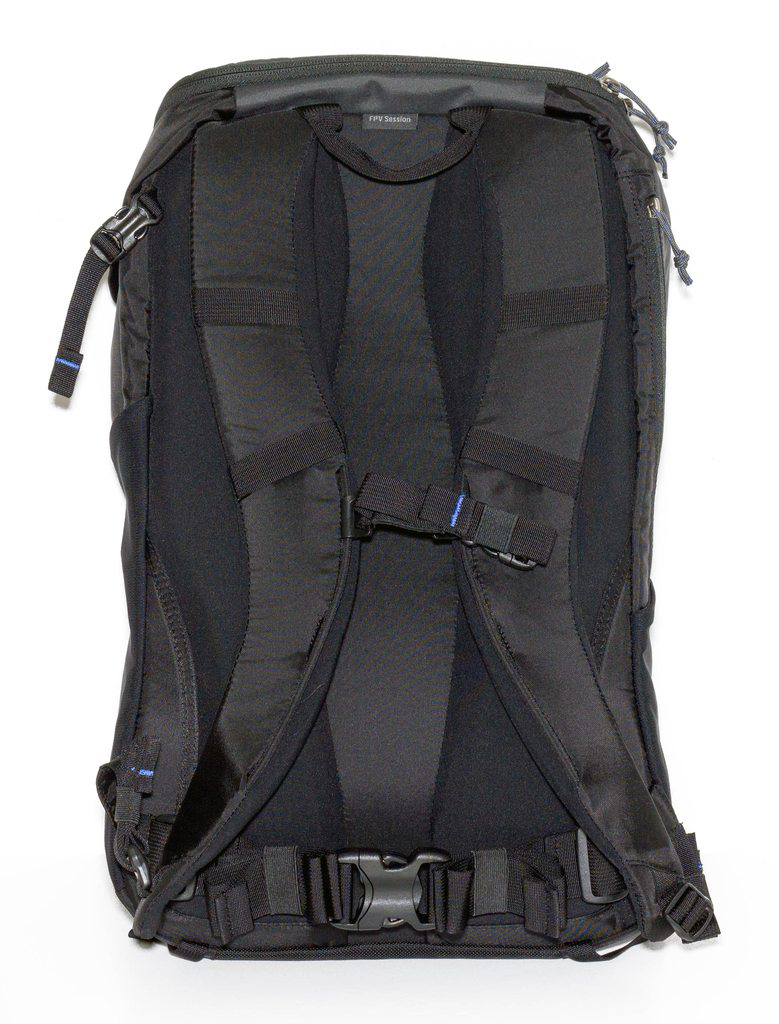
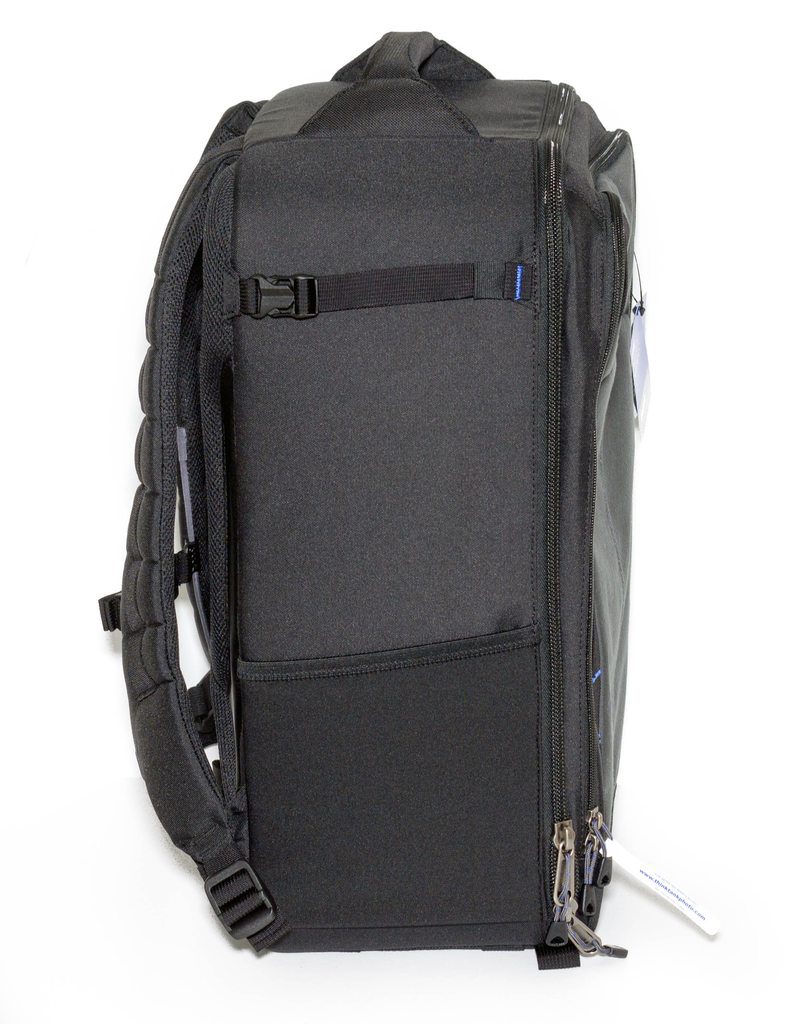
The back-side of the backpack offers very similar features to the Helipak with more attachment options on the arm pieces, as well as chest and waist support straps. If you plan to carry a lot of stuff these parts are key to ensuring you do not do any damage to your back!
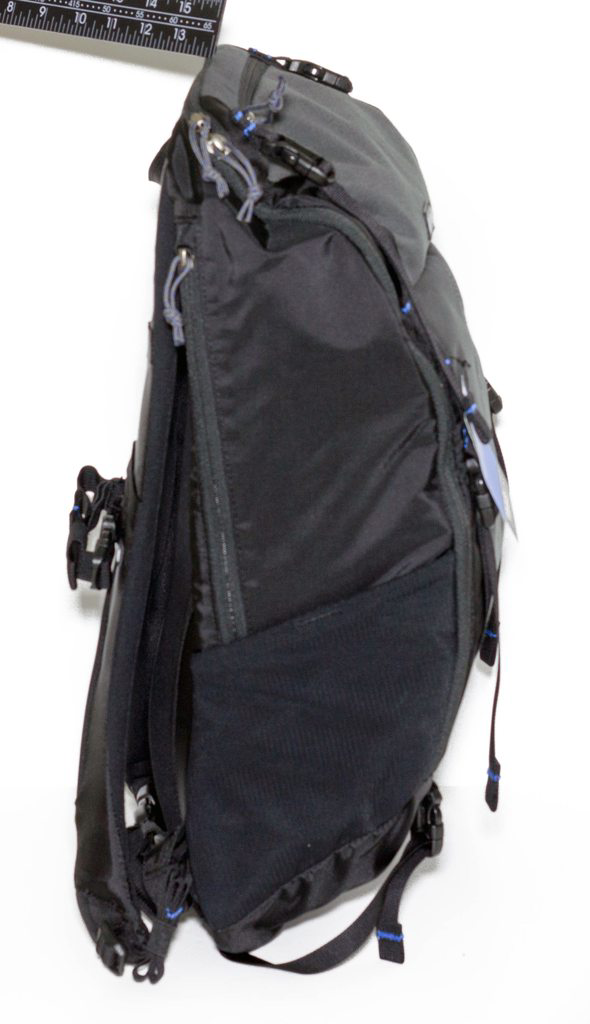
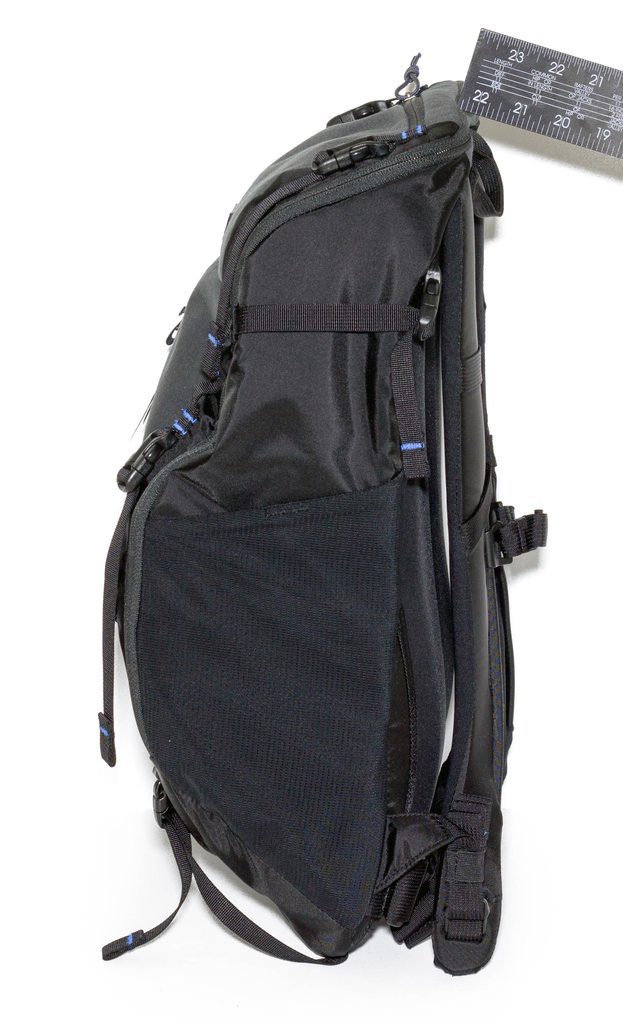
On both of the sides we have some more elastic pouches that expand a great amount, with adjustable straps above. Again, these fit tripods with ease, even my main camera tripod fits though it does make it a little top heavy as it has a big head :).
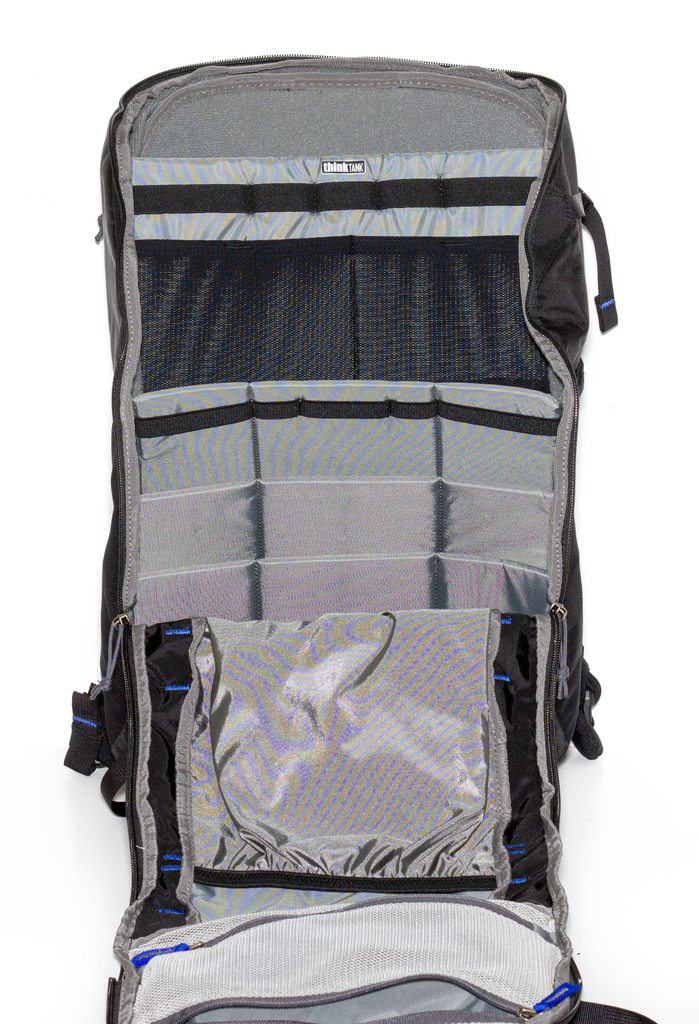
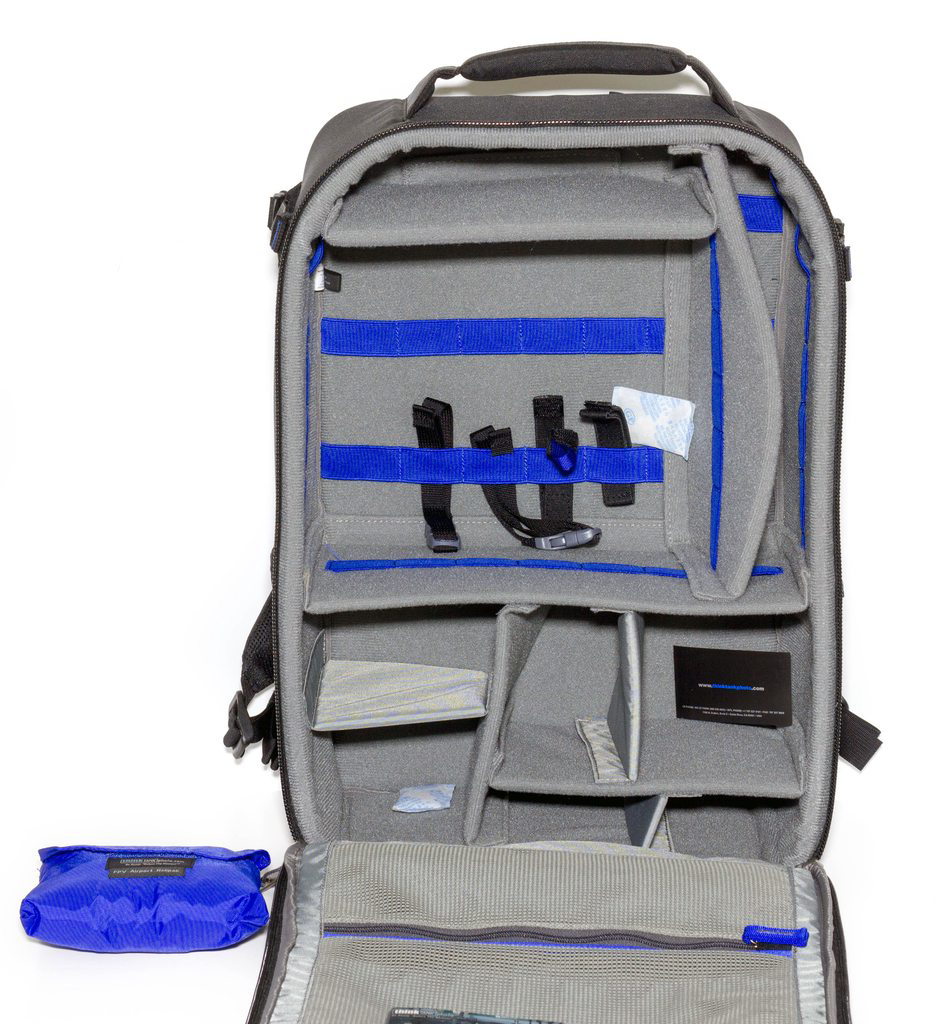
Inside we can see we have a ton of storage. The top shelf-based area is designed to house your transmitter and goggles, which has a load of elastic storage for all of your tools, goggle batteries and other important equipment. Below that we’ve got similar amounts of storage, and again it is all adjustable as it is velcro-based.

On the outer side of the flap we’ve got some zippable storage options which can be opened from the top or bottom - useful if you open it out and it is then upside down. There’s also another elastic based bag area which is ideal for propellers and other space-intensive items.
Accessories
Not only were ThinkTank kind enough to send out both backpacks, but they also included their full lineup of accessories to go with it too! Also put to the test are the Radio TX cover, the FPV Action Cam pouch and the Battery holder. Similarly to the bags, we’ll go over some of the base product shots as it has arrived, and I’ll go into depth about my usage and thoughts on them.
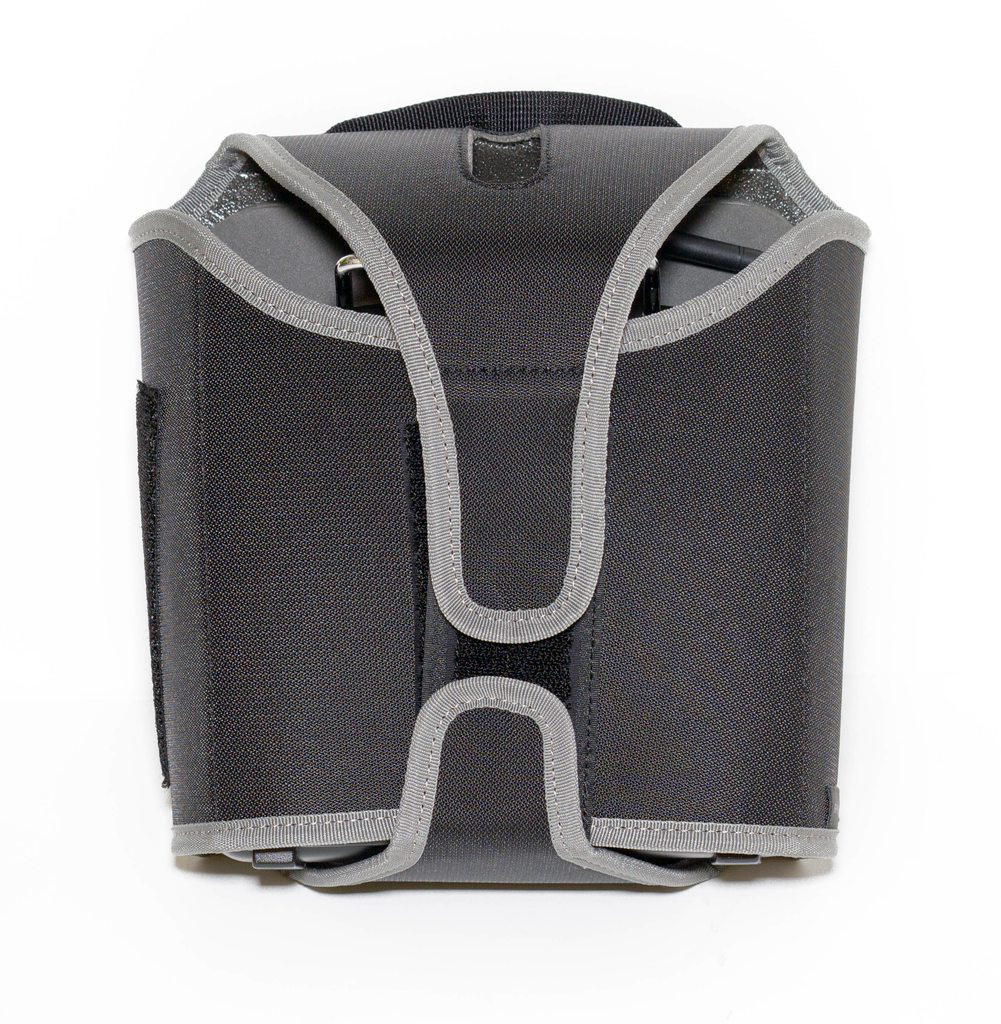
Radio TX Cover
First off in the accessories range we have the Transmitter Cover! Designed to work with a multitude of radios (Spektrum DX9 and FrSky Taranis included), the cover provides huge protection using high-density closed-cell foam, as well as protected the sticks and switches from knocks or drops.
This is the first accessory in the range I’ll be looking into and retails for around $19.75 at the time of posting.
Here on the rear we can see the two sides join via a velcro mechanism. Both the top and bottom flaps also attach to here, depending on how large the radio is.
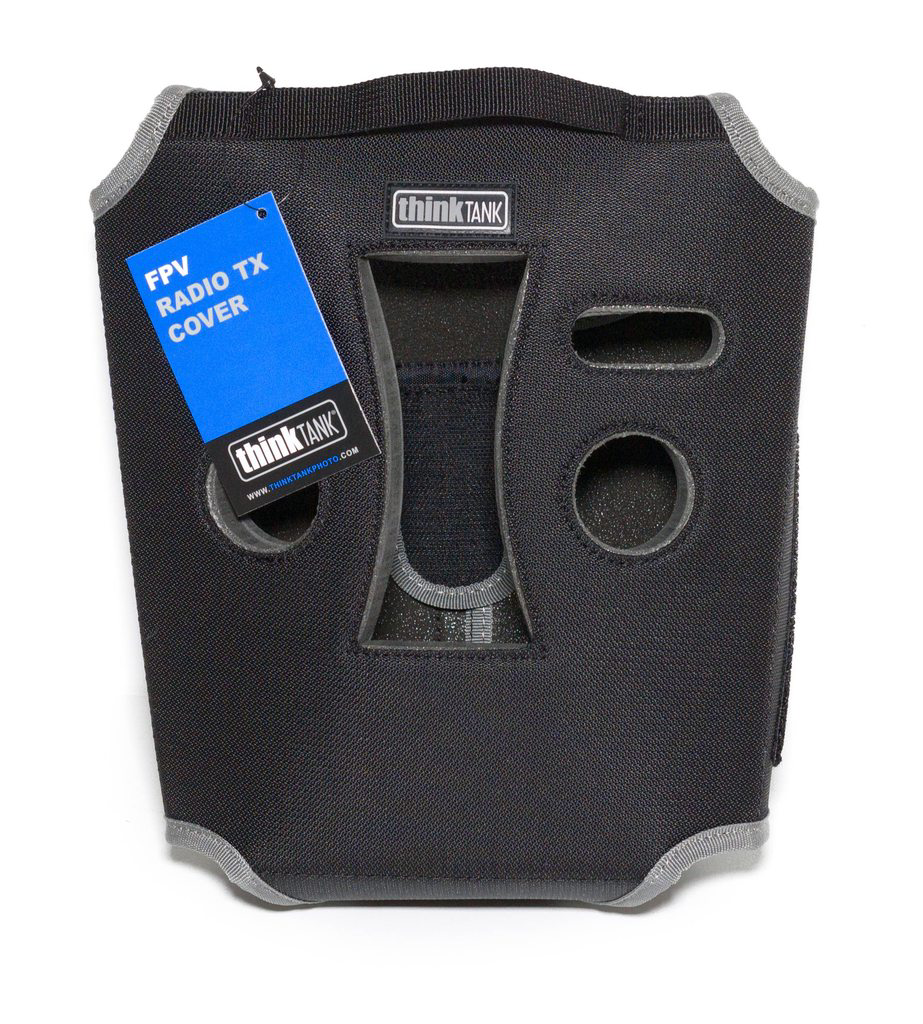
From the front we can see the foam is pretty thick, with cutouts that should suit most radio layouts (that are similar) - you obviously won’t be fitting a Horus in here :)
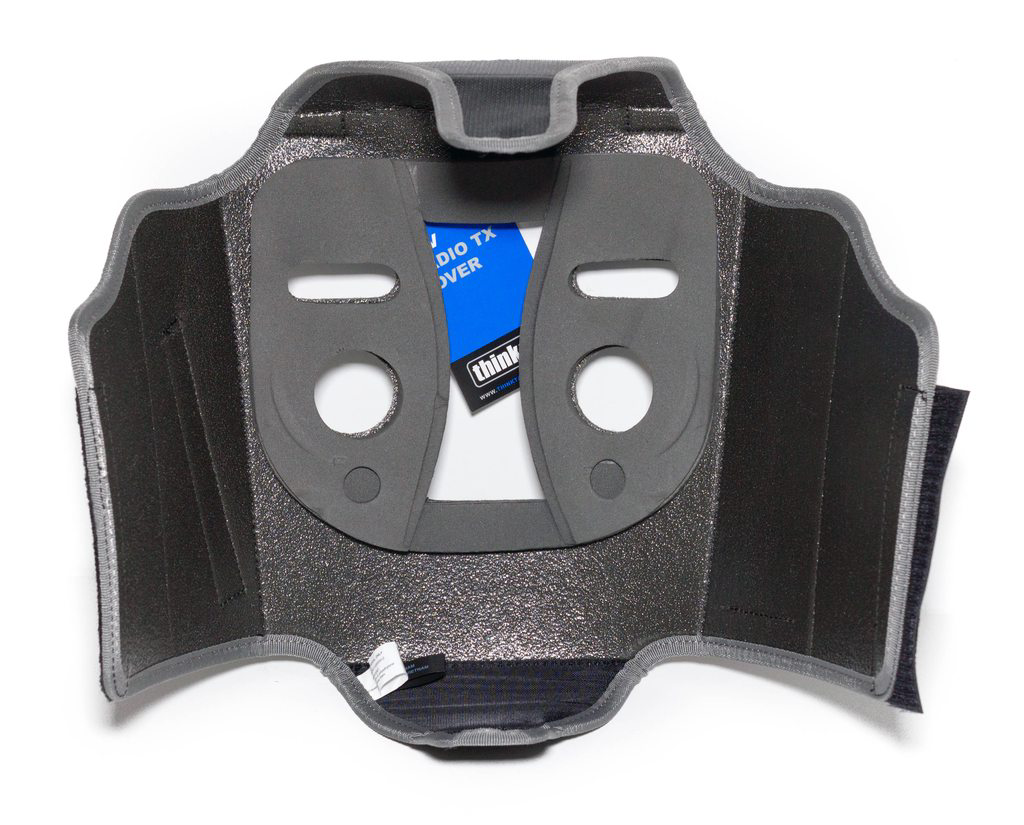
Inside we can see we’ve got all of the major protection for the front, and your usually foam padding all around everywhere else.
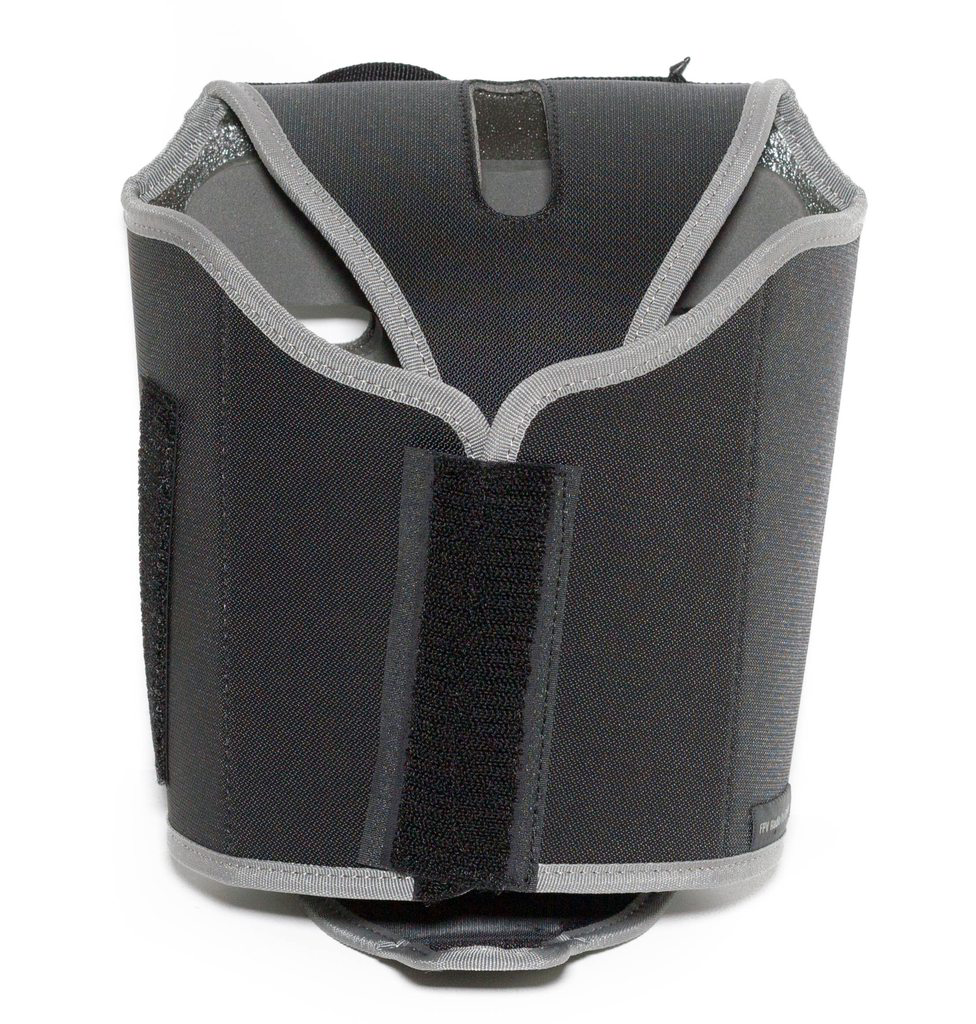
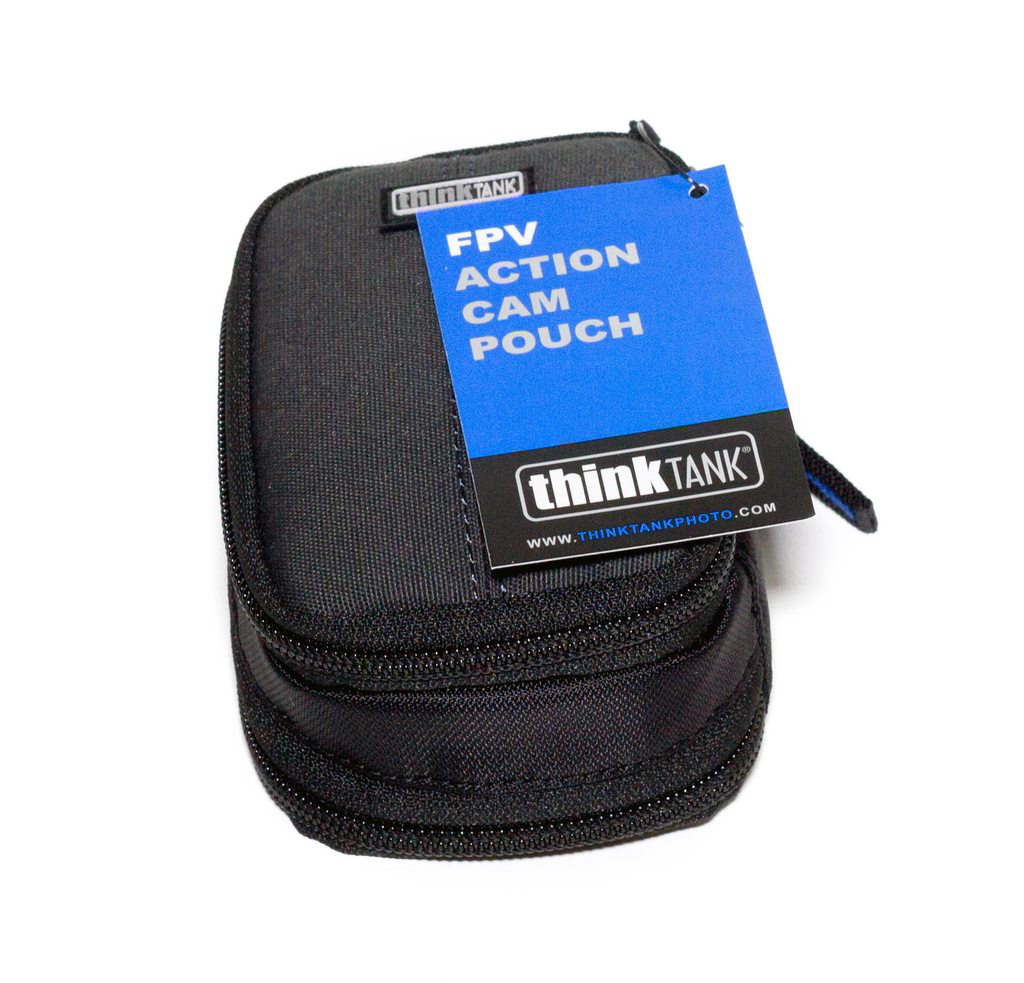
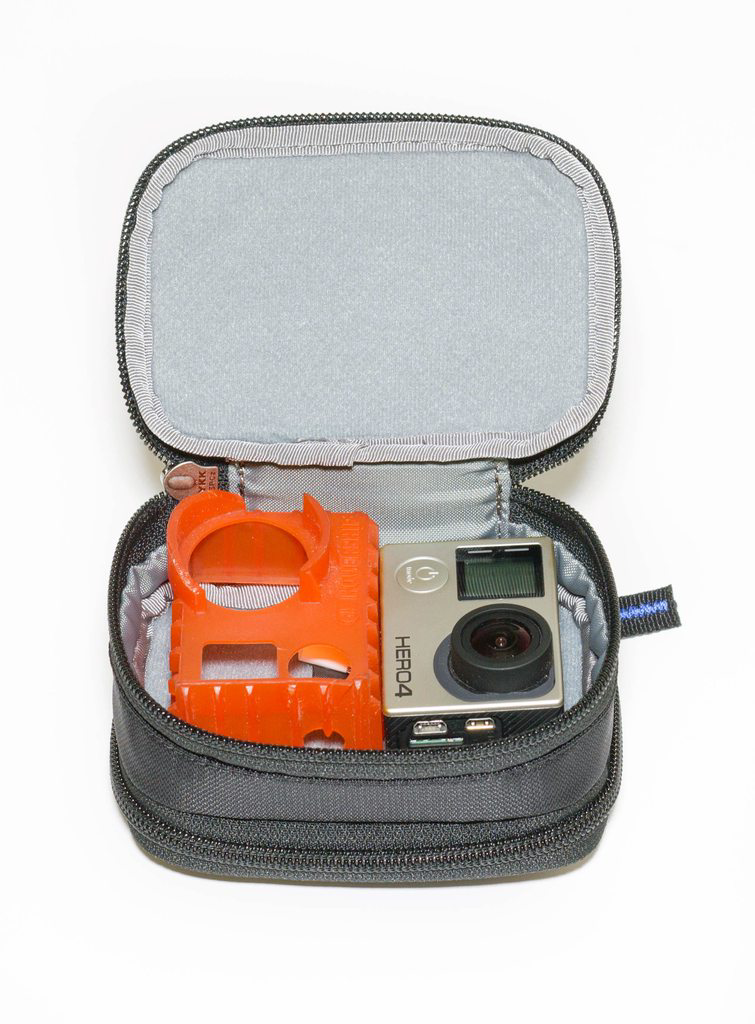
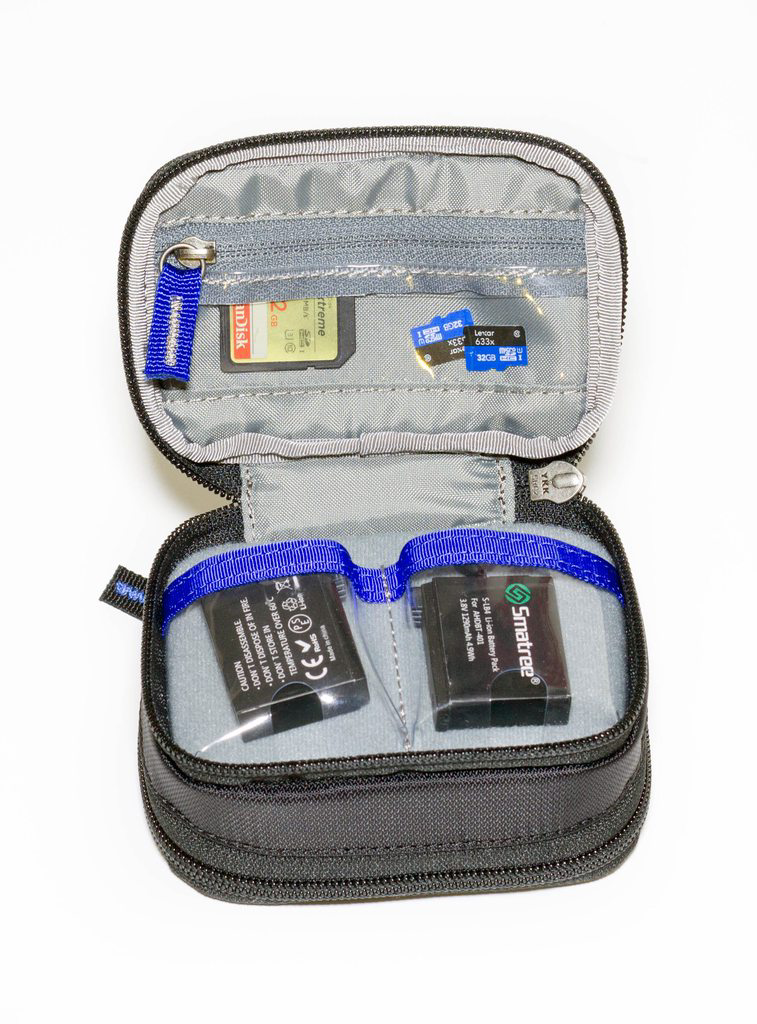
FPV Action Cam Pouch
Next up we have the Action Cam Pouch! This storage solution will fit at minimum 2 GoPros in one side, and a whole host of accessories in the other, with lined pockets suitable for batteries, zippered pockets for cards and is completely plush lined to help protect those lenses during transport!
This product is currently on sale direct at 19.75 also.
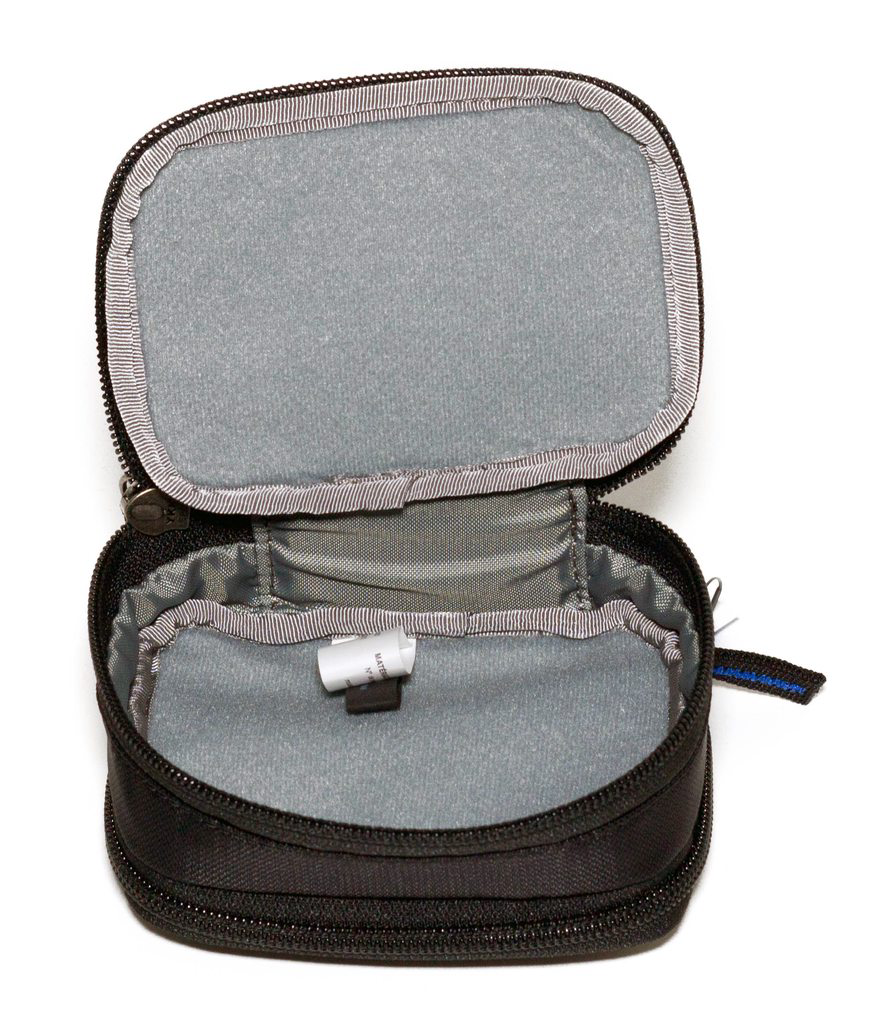
Inside we can see ample space for 2 GoPro Hero cameras, it will of course fit even more Session-style cameras :)
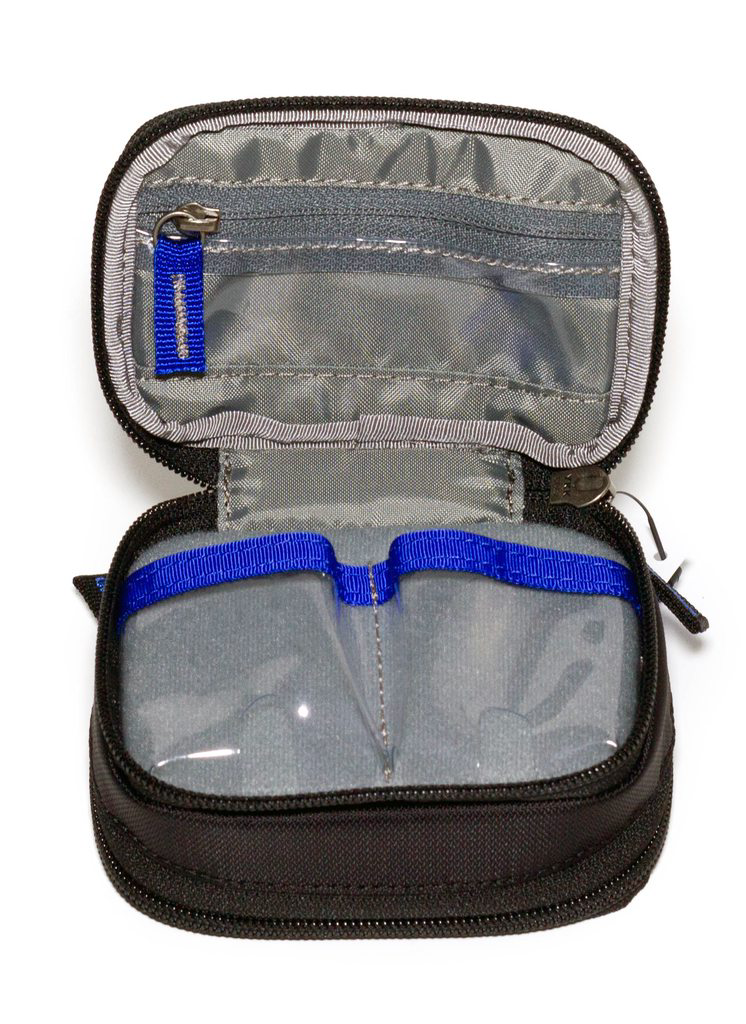
On the other side we have the memory card and battery storage we talked about, individually compartmented for maximum storage efficiency!
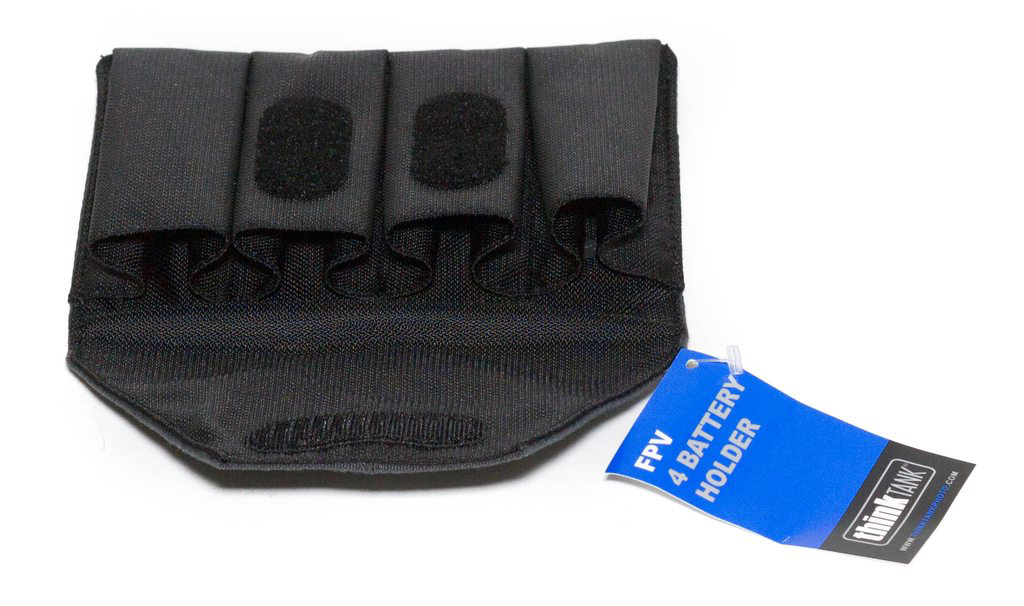
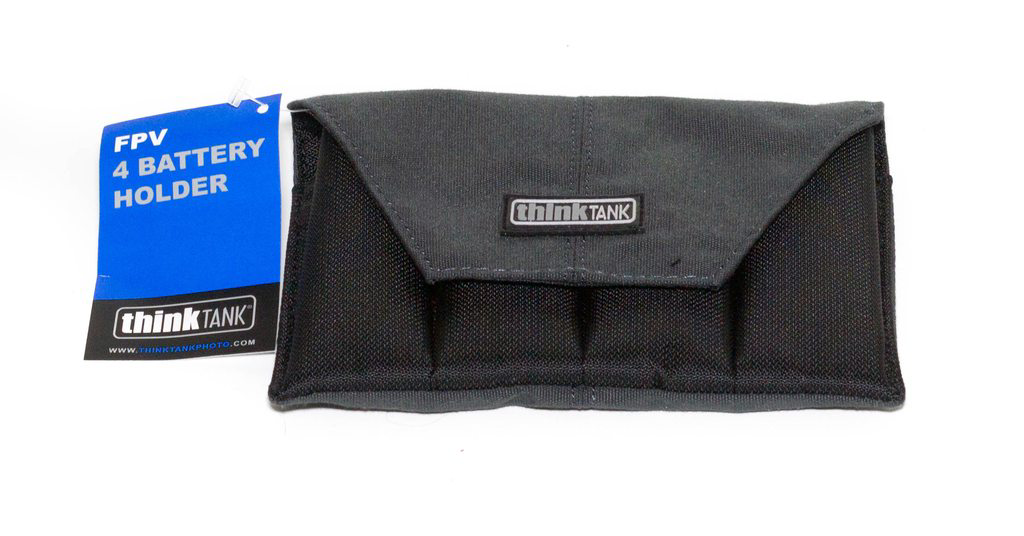
FPV 4 Battery Holder
This is the last of the accessories and the last of the ThinkTank products in for review this time! Right here we’ve got a Lipo holder that will fit 4 lipos with ease. Priced at around $14.75 at current, it will fit 3s or 4s lipos, ranging from anything up to 1800mAh per slot! It features the same durable materials as found on the other accessories and travel gear, and has a closable flap that secures via velcro.
Real World Usage
So how do they work in the real world? Do they actually work in the real world? Is there anything I’d change? Is there anything I don’t like? Is there anything I love? I’m hoping to answer all of these as I go.. :)
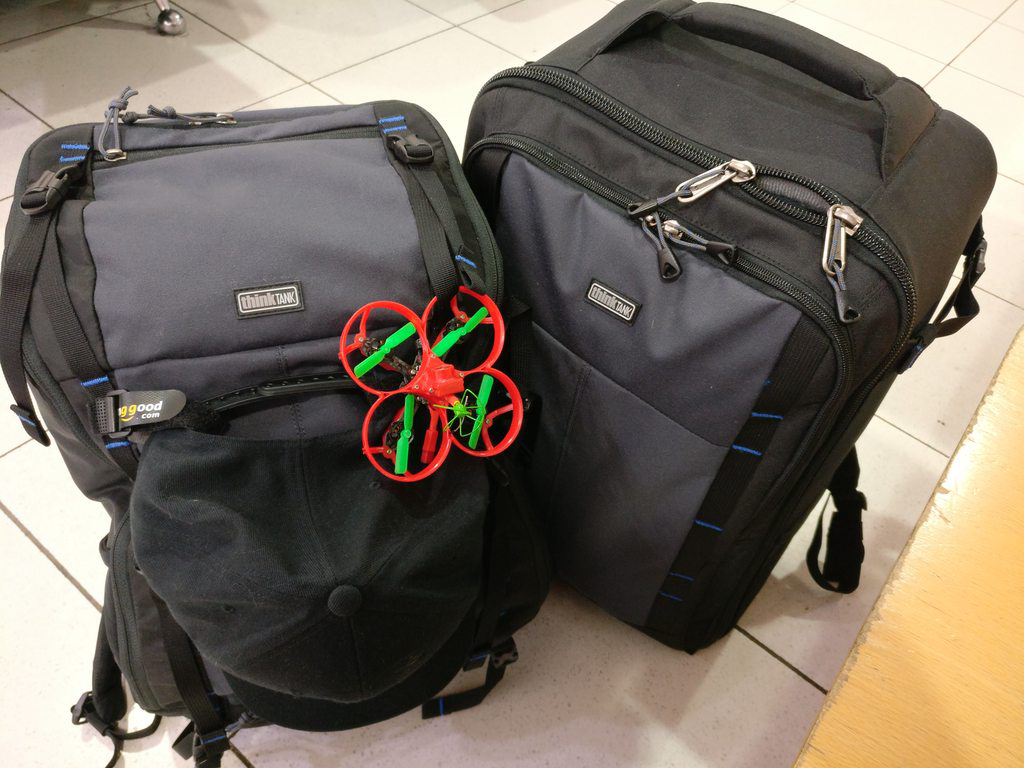
So I’ve been lucky enough to go to some International events the past couple of months, where I’ve been making full use of both of the Helipak and the Session on my journeys. They have completely replaced my existing travel bags right now, I am not taking any hold luggage so this is literally all I’m taking as both my carry-on items!
Airport Helipak
I’ll start with this one first because I think it’s a direct comparison with my Lowepro BP X2 that I have. First off, I think the space usage even just looking at it is far better - not only are the dividers all vertical (meaning that you are not limited to using specific equipment in specific places), but the top half of the backpack is square meaning you get full storage space in the corners - a big disadvantage on the BP X2 in my opinion if you are trying to optimise all the stuff you can take with you on a trip. Now this of course only really matters if you plan to use it as it was kind of designed - for travel use, particularly with air travel!
I have not taken any inside photos as my day-to-day bag has actually now switched to the Session (and I was using it to fit quad stuff as well as personal travel items such as clothing and toiletries!), but I will say however I absolutely love the Helipak. It fits so much in without being too big, and allows you to fully customize everything by moving the dividers around as well as strapping down quads with the provided straps. Even with the 15-20kg I was carrying in it (lipos etc), with the back and chest straps provided and the super soft back material lugging them around the airports and in-between was super easy and did not tire. The thing I love most about this backpack is it actually makes it super easy if you get stuck at TSA/Customs and they want to inspect your bag - because everything is set into vertical dividers nothing falls out when it is opened for inspection.
I also love the fact that the outer material is super strong and does not deform, keeping the structure of the bag as it would be if it was empty, even when jam packed (taking gear for a week in only 2 carry-on items including 3 quads with spares is no easy task - trust me!), but they worked well.
For me, I think they could slightly improve upon the design. While it IS a backpack, I’d love to see some additional wheels on the bottom of the bag. I think having the ability to wheel it would make for an awesome upgrade assuming they would not take up too much space, but that is of course a very specific use case for me because I’m taking two backpacks, usually with equal weight!
FPV Session
I must admit this is now by far the most used bag I have, and with good reason. Many many people have this backpack in the US, you see it in all of the videos on YouTube, whether it’s at races or freestylers travelling around to new locations. So for me personally, its an interest to see if the bag is really as good as it would seem, or if people had just been carefully selected to receive them in a good marketing strategy!
From using it intensely for the past couple of months, I can say there are MANY good reasons people use them, and I too have found it is a near perfect backpack!
Aside from the international use I’ve been using it for all of my local flying sessions - whether it’s dedicating a whole day to flying (and all the gear needed), or if it’s just getting out and ripping a few packs at lunch.

The main thing that sells me with this backpack is the versatility of it. While it’s smaller than the Helipak, you can fit so much stuff in it, and quads on the outside, that it kind of makes up for itself in that respect. Going for lunch time sessions I can keep it nice and light with only the basic tools, a few sets of props and as many lipos as I can charge/fly in the time I have.
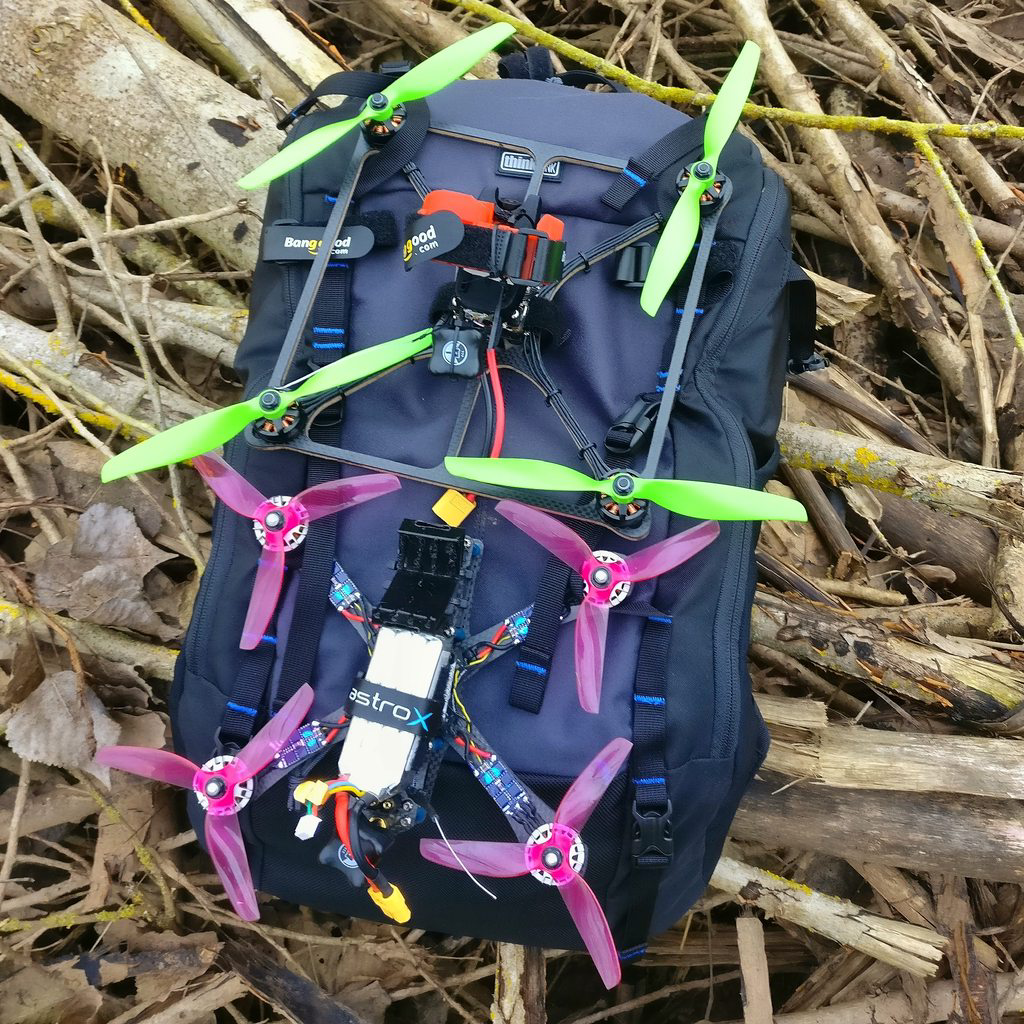
Here is how I currently have my bag setup, and this is my current “lunch” setup - just in case I have a failure I have backups, and there’s also some other gear I’m reviewing at the same time.. :) This is more of a heavier setup than a single quad, but the backpack makes it so easy to carry more - why not!?
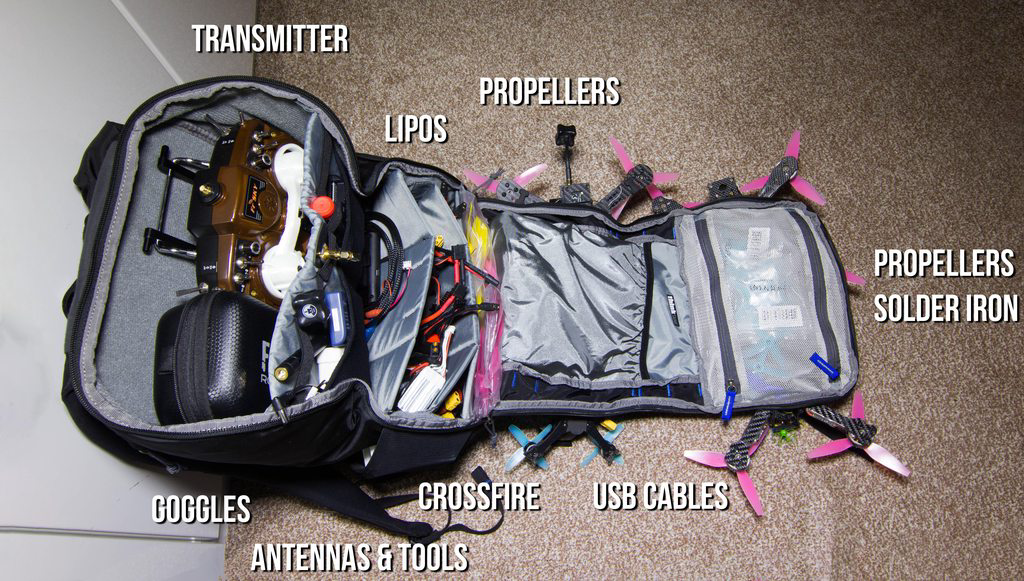
If we take a look inside the bag we can see how my stuff is currently laid out. There’s a ton of space to fit everything in. I have around 10-15 packs of propellers in the bottom, 20 lipos in both compartments (I actually run a used/ready to rock system while I put the used lipos in one compartment and the new ones in another). Further up we can see some tools, my crossfire system and some spare cables. Further up we have battery checkers, antennas and goggle batteries! Right at the top we have perfect space to house my Fatshark HD V3’s and my Taranis. You’ll notice here I don’t bother with the transmitter protector accessory, just because for this it isn’t needed with the gimbal protector that I have printed. This is mainly due to time reasons, it’s far quicker to just remove the gimbal protector, and the same with packing up.
Right at the bottom we have an array of USB Cables (every type you can imagine), with some more propellers and useful tools for fixing my quads in the field such as soldering iron and socket sets!
For me it offers tons of storage space, allows customization, but most importantly fits everything I need in with ease. Being top quality materials this is likely the last backpack I’ll ever need (unless they come out with revisions that are too tempting of course!), so top marks to ThinkTank!
TX Cover
Next up we have the transmitter cover!
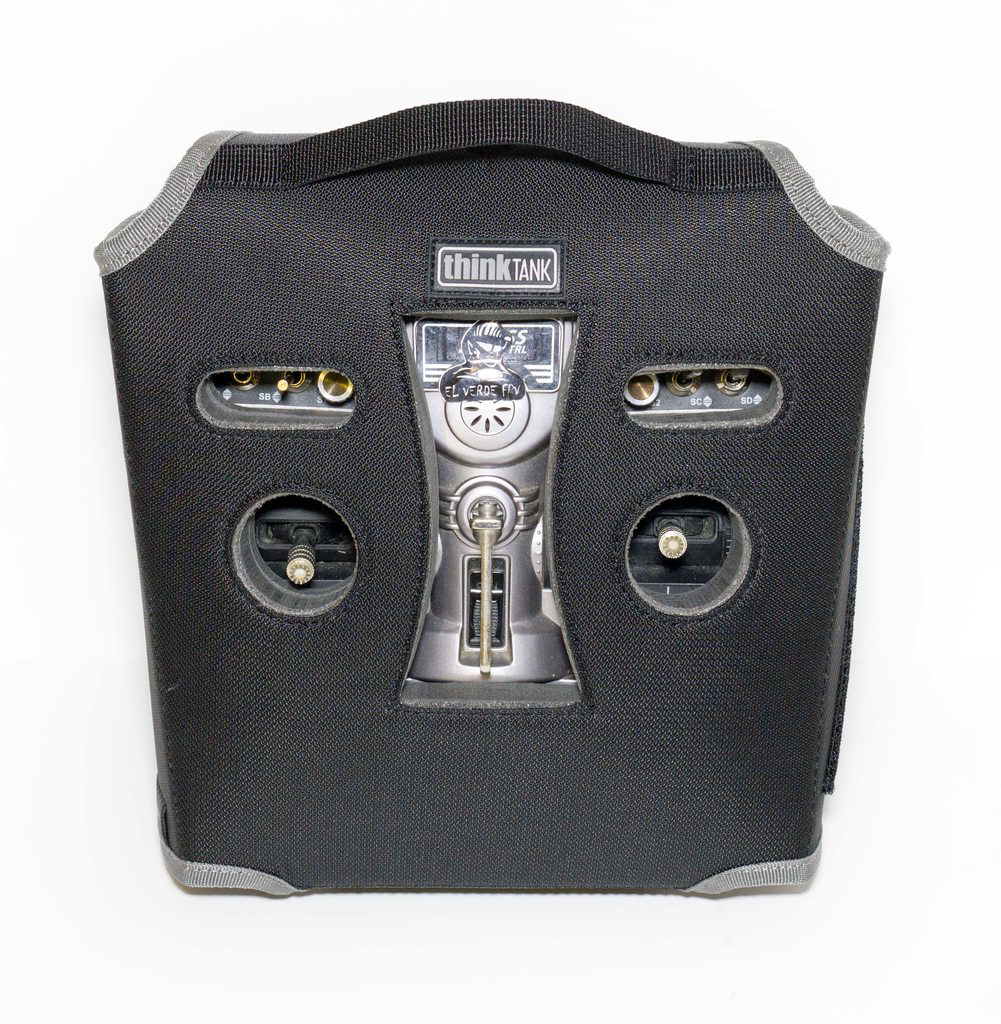
As we can see from the pictures the Taranis fits in perfectly and all of the cutouts are in the places we’d expect. Out of the picture and behind the material the Antenna is actually very well protected - this is in my opinion the major weak spot of any transmitter, and while protecting gimbals is great if you can’t protect the thing that’s transmitting the signal to your RC vehicle, then what’s the point!
I must admit I am kind of spoilt by the products I can now transport my quad gear in - so much so that personally I haven’t really used this - primarily because the padding and protection the bags offer is so good that it’s not realistically needed. The gimbal protectors, for me at least, offer great portability without sacrificing the speed at removal to go and fly. Now that I’ve gone to the 8dbi SMA antenna mod, my antenna being protected is not really an issue - however of course saying that I have only done the antenna mod because it was damaged in transport and eventually moving around so much frayed the antenna! So if you are looking at a transmitter transport solution that protects everything it needs to then this is likely a good product for you!
FPV Action Cam Pouch
On to the next accessory we have the action camera holder - this for me is a hugely useful product. While it’s great carrying your GoPro on the drone itself, if you need to remove the GoPro mounts for space reasons, or just want to secure it in a good place with the rest of the accessories (extra batteries, memory cards etc), then this is ideal!
As we can see from the pictures it makes storing all of what we need for a day or two’s worth of flying super easy. I tend to lose these memory cards pretty easily so unless I lose the whole thing I’ll be able to find them, and the material colour is perfect to distinguish what’s in there compared to the background of it.
I have mostly moved to Session’s now (I’ve finally caught up with the pack), and you will not struggle to fit at least 4 in there, I think you’d even fit 6 if you can afford to have 6 that is :)!
FPV 4 Battery Holder
The 4 Battery Holder supports a range of sizes that should be compatible with any mini quad flyer. I pretty much exclusively run Turnigy Graphene’s right now, and I can say that the holder fits the 1300mAh and 1500mAh 4s without issue - and as we know with these Lipos (or maybe you didn’t), they are usually quite a bit bigger and heavier than the competition.
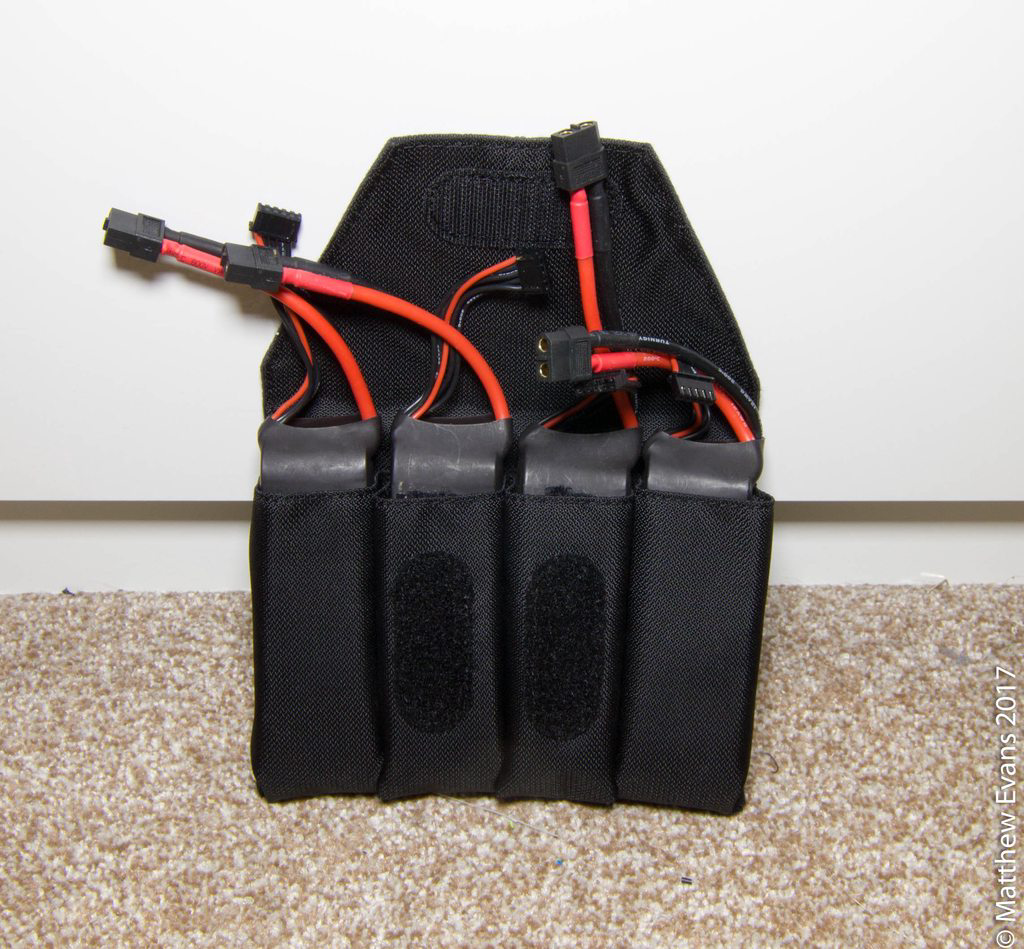
As we can see the 1500mAh fit ok, they are the same size as other 1800mAh lipos so to give a point of reference you will fit larger lipos in without issue. I don’t think 5s cell count lipos would fit though.
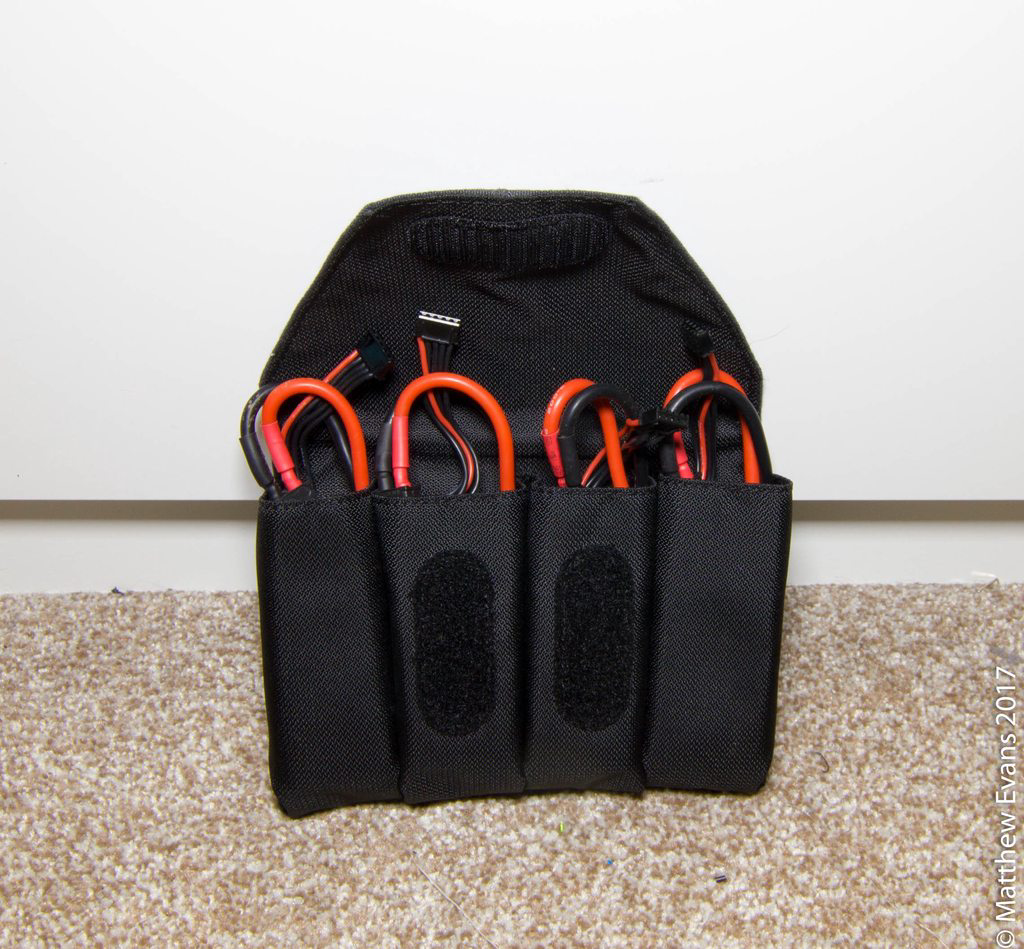
The 1300mAh fit with ease and is in my opinion the perfect size for it. For me personally, when travelling I like to keep all my lipos in a bag that states the TSA regulations on them. There’s one bag in particular that does that, so I think as for an improvement on these if there was a way to add the regulations in, or to even add some fire-proof materials into the mix then it would aid transportation. I don’t like to take any risks when travelling with lipos as I don’t want any confiscated, but for normal flying activities they offer a good storage solution, with protection at the same time.
Final Thoughts
I hope my personal usage write-up and overall review on all of the products in here have been of some use! In terms of comparison to the Lowepro BP X2, personally I am preferring the ThinkTank alternatives right now, for practical reasons. I actually preferred the colour scheme of the BP, but in terms of features and maximising storage the Helipak wins hands down! I can now also personally see why the FPV Session is so popular and continue to use it at every session, it makes everything so easy to access it’s a bit of a no-brainer. And of course when I’m finished with the flying session, packing up and going home is just as easy!
So for me, I love the both backpacks; the Helipak particularly for more gear and travelling, with the Session being super good for those normal local-ish sessions. :)
Until the next one…
Product Links
FPV Airport Helipak Backpack - Amazon US / Direct / Clifton Cameras - UK FPV Session Backpack - Direct / Clifton Cameras - UK FPV Radio Transmitter Cover - Amazon US / Direct / Clifton Cameras - UK FPV Action Cam Pouch - Amazon US / Direct / Clifton Cameras - UK FPV 4 Battery Holder - Amazon US / Direct / Clifton Cameras - UK